Navigating Autotask
Top navigation overview
At the top of the Autotask website, you will see a persistent navigation menu that provides access to all features and functions that are available to you.
Each item is explained here. Click the arrow to the left of the icon to expand each section.
IMPORTANT The specific items and links you will see are determined by the security level you were assigned by your administrator. Not all users will see all options pictured below.
Navigation items explained
From left to right, you will see the following menu items:
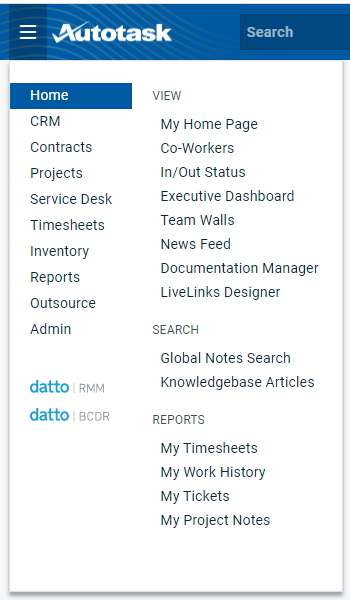
Your security level will determine the areas and options that you can access. Click an item to go to a page.
NOTE For customers who have not licensed Datto RMM and Datto BCDR, the Datto RMM and Datto BCDR links will open product information pages on our corporate web site. If you enable the Datto RMM integration, you can use this link to seamlessly navigate to Datto RMM. If you license Datto BCDR, the link will disappear, because SSL is not available.
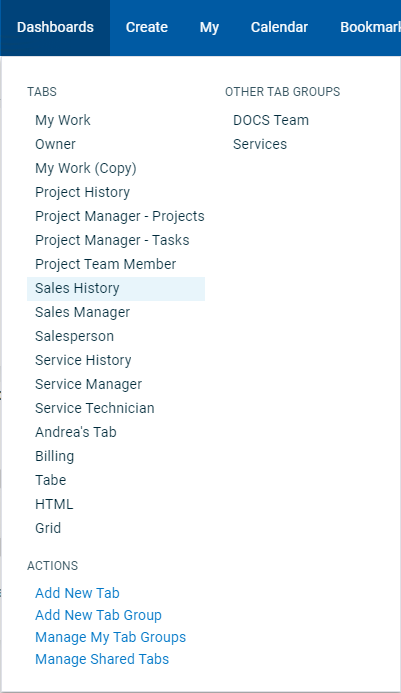
The Dashboards menu gives you direct access to all tabs on the default tab group (called Tabs). This is useful because the tab labels are sometimes not completely visible. You can switch to any other tab groups you have created, and the Actions menu allows you to manage tabs and tab groups.
Refer to Dashboards.
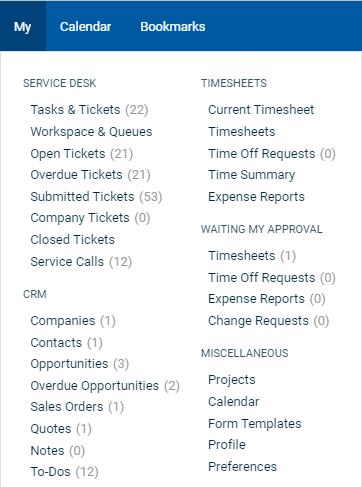
Clicking this icon expands the My menu. It lets you directly access items that are associated with your user account. Items are included here if you are, for example, the primary resource on a ticket, or the account manager for an organization.
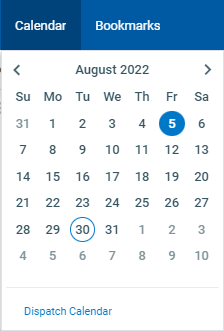
Hovering over Calendar will display the current month.
- Use the arrows to navigate through the months.
- To open your personal calendar, click on a date to open the calendar for that day. Dates with scheduled items are blue.
- To open the dispatch calendar, click Dispatch Calendar. Refer to Overview of the Dispatch Calendar.
TIP The First Day of Week is a location-level setting. An administrator can select Monday as the First Day of the Week for your location. Refer to Internal locations.
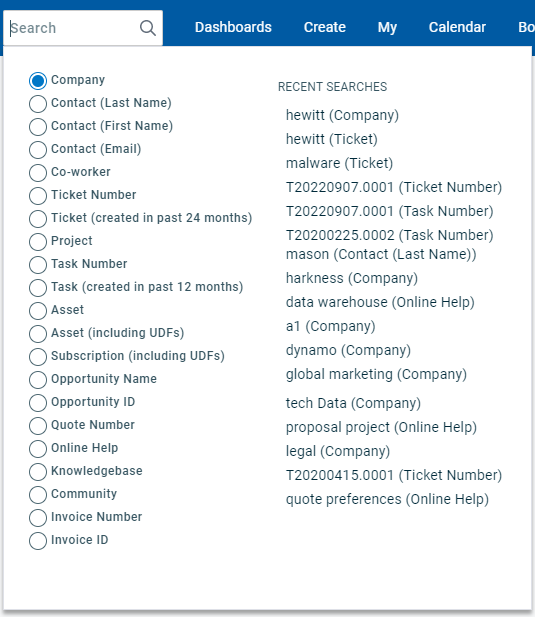
The main Autotask search appears in the top navigation bar. It lets you search a large number of database fields. Additionally, you can search the Online Help, your Knowledge Base, and the Datto Community.
Not all search types support the same search options. The following table lists the search options available for each search type.
| Search Type | Contains |
|---|---|
| Organization | Returns all accounts that contain the search string in the Organization Name or Organization Number fields. |
| Contact (Last Name) | Returns all contacts that contain the search string in the contact's last name. |
| Contact (First Name) | Returns all contacts that contain the search string in the contact's first name. |
| Contact (Email) | Returns all contacts that contain the search string in the contact's email address. |
| Co-worker (searches First Name and Last Name) | Returns all co-workers that contain the search string in the First Name or Last Name fields |
| Ticket Number | Returns all tickets that contain the search string in the Ticket Number field. NOTE Requires the security level permission Can view Ticket Search. |
| Ticket (created in the past 24 months) (searches Ticket Number, Ticket Title, and Description) |
Returns all tickets that contain the search string in the ticket number, ticket title, or description, and were created within the specified number of months. The number of months is determined by the system setting When searching by "Ticket" using the main Autotask Search, limit search to tickets created within this many months by default (lowering this number will increase search speed). NOTE Requires the security level permission Can view Ticket Search. |
| Project (searches the Project Name and Project Number fields) | Returns all projects that contain the search string in the Project Name or Project Number fields. |
| Task Number | Returns all tasks that contain the search string in the Task Number field. |
|
Task (created in past 12 months) (searches Task Title, Task Number, and Task Description) |
Returns all tasks that contain the search string in the task number, task title, or description, and were created within the specified number of months. |
| Device | Returns all items that contain the search string in the Device Name, Reference Number, Reference Name, or Serial Number. |
| Device (including UDFs) (same as above including all User-Defined Fields) | Returns all items that contain the search string in the Device Name, Reference Number, Reference Name, Serial Number or a user-defined field. |
| Subscription (including UDFs) | Returns all items that contain the search string in the Subscription Name, Description, and user-defined fields. |
| Opportunity Name | Returns all opportunities that contain the search string in the Name field. |
|
Opportunity ID |
Returns all opportunities with an opportunity ID (unique Autotask identifier) that begins with the search string. |
|
Quote Number |
Returns all quotes with a quote number that begins with the search string. |
| Online Help | Returns all topics that contain the search string. |
| Knowledge Base | Returns all articles in your Knowledge Base that contain the search string. |
| Community | Returns all items that contain the search string. A verified email is required to access the Community. |
| Invoice Number | Returns all invoices with an invoice number that begins with the search string. |
| Invoice ID | Returns all invoices with an invoice ID (unique Autotask identifier) that begins with the search string. |
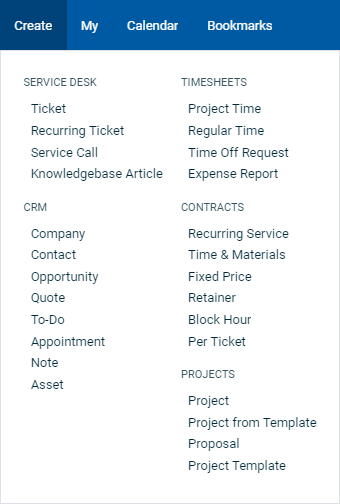
The Create menu contains shortcuts to the New Entity pages of items that are frequently created manually. Just clicking Create opens the New Ticket page.
The contents of the menu depend on the security level of the user. You will only see items you have permission to create.
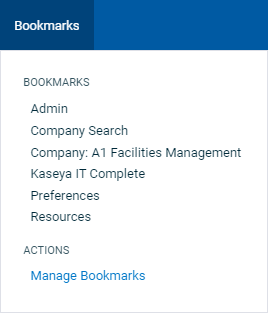
The Bookmarks menu has the following features:
- To bookmark a page, click the star
 next to the help
  icon. The star will turn yellow to indicate the page is bookmarked.
 - To remove the bookmark, click the star again.
- To open a bookmarked page, click on an item on the Bookmarks menu.
- To manage your bookmarks, select Manage Bookmarks and select the bookmarks you wish to delete. Then click the Delete Selected button. To delete all bookmarks, click the Delete All button.
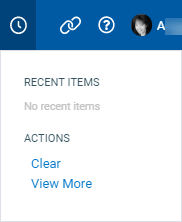
Clicking this icon expands the Recent menu.
- Click on an item to open it again.
- Click View More to display even more recent items.
- Click Clear to remove all items from the Recent list.
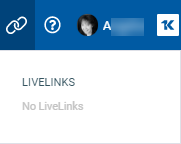
Click this icon to select a LiveLink. Refer to LiveLinks.
NOTE Client Portal users will see a LiveLink to submit or view a ticket via the Client Portal.
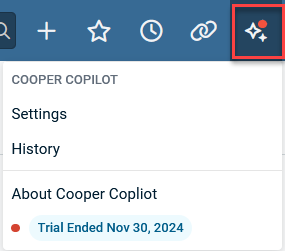
Click this icon to view Cooper Copilot history and settings. Refer to Cooper Copilot.
Click this icon to expand the general Help menu. If a red dot appears on the icon![]() , there has been an update to the What's New page since you last viewed it.
, there has been an update to the What's New page since you last viewed it.
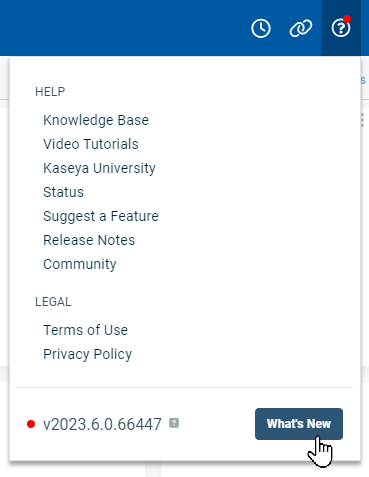
The following items are available:
- Knowledge Base This opens the online help system.
- Video Tutorials This opens a page in the online help which outlines learning resources and provides links to video tutorials. Refer to Learning Resources.
- Kaseya University This takes you to the log in page for Kaseya University, where you can access all the educational resources provided by Kaseya.
- Status This opens the Datto Status page, where you can see the status of all of Datto's products. Refer to https://status.kaseya.com/
- Suggest a Feature This opens the Ideas section of the Kaseya Community. Refer to Community.
- Release Notes This opens the Autotask Release Notes. Refer to Autotask release notes.
- Submit a Support Ticket This opens the Kaseya Helpdesk to submit a ticket to support.
- Kaseya Community This opens the Kaseya Community. Refer to Community.
- Show Me This is a guide that can walk you through common, everyday scenarios.
- Onboarding Tasks This opens an onboarding guide that can assist you with setting up your basic Autotask configuration.
- Terms of Use This opens the current Kaseya Terms of Use.
- Privacy PolicyThis opens the current Kaseya Privacy Policy.
- Version number This shows the Autotask version and build number that you are currently using. Click on the adjacent icon
 to open the About Autotask page. The About Autotask page has additional information about your database.
 - What's New This will open a page explaining what's new in Autotask. If the page has been updated and you have not yet seen the updates, a red dot will appear on the help icon in the main navigation bar
 .
.
NOTE To open the help topic for the specific page you are on, click the help icon ![]() in the upper right corner of any Autotask page.
in the upper right corner of any Autotask page.
![]()
Refer to How do I use context-sensitive help?.

The user menu icon displays the photo, avatar, or initials associated with your user account, as well as your first name. Clicking the icon will expand the menu that includes the following:
- Your full name and email address.
- A link to your Settings page. Refer to Settings.
- A link to your Profile page. Refer to Managing your profile.
- A link to Check My Browser Settings. Refer to Browser settings.
- The Log Out link.
All the way to the right, you will see one of two icons:
-
 The KaseyaOne icon: this icon appears if you have logged into Autotask, but not used the Log in with KaseyaOne button or logged in from the KaseyaOne portal. Clicking the icon will launch the log in dialog and open KaseyaOne if successful. Refer to Getting started with Autotask.
 -
 The waffle icon: if you have logged in with KaseyaOne, you will see a waffle icon. When you click this icon, the My IT Complete menu will appear. From there, you can seamlessly open all other Kaseya products you are subscribed to. Products you are not subscribed to appear under the heading Discover More.
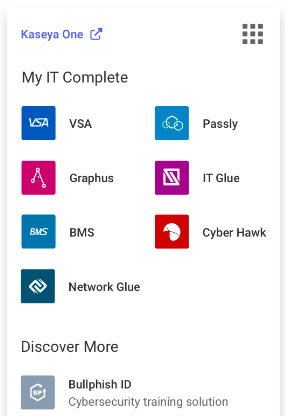
Refer to KaseyaOne.

