The Activity tab
PERMISSIONS Access to the parent entity and object permission to view, add or edit the activity
NAVIGATION Left Navigation Menu > Service Desk > Search > Tickets > click Search > open a ticket > accessory tabs > Activity
NAVIGATION Left Navigation Menu > CRM > Search > Organizations > click on an organization name > accessory tabs > Activity
NAVIGATION Left Navigation Menu > CRM > Search > Organizations > click Search > click an organization name > accessory tabs > Contacts > click a contact > Activity
NAVIGATION Left Navigation Menu > CRM > Search > Contacts > Contact (Last Name) or Contact (First Name) or Contact (Email) > click a contact > Activity
NAVIGATION Left Navigation Menu > Contracts > Search > Contracts > open an umbrella contract > Activity
NAVIGATION ...and all other new entity pages
The Activity tab is the working area of the entity. You can view notes, attachments, and other associated items that have been added to the entity, and create new ones. To open the page, use the path(s) in the Security and navigation section above.
The activity tab on the Organization and Contact pages has special features. In addition to the notes, attachments and to-dos associated with the selected organization or contact, the activity on related entities appears as guest activity on the organization or contact activity feed.
You can filter the feed to look for activity on certain entities. Your filter options may be limited by your security settings. Notes, to-dos and attachments will always be selected by default. You can select additional entities to be included.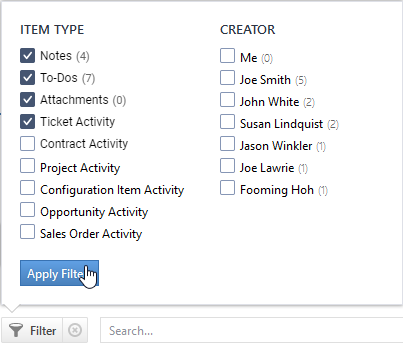
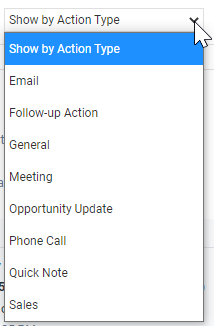
Additionally, CRM notes and to-dos can be filtered by their Action Type.
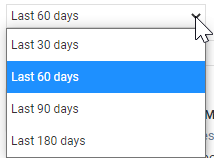
The activity feed can be filtered to display items from the last 30, 60, 90 or 180 days. Older organization notes, to-dos and attachments can be viewed on their respective accessory tabs. Older notes, to-dos and attachments of associated entities can be found on the accessory tabs of each entity.
Each related entity that appears on the activity feed has its own distinguishing icon.
| Icon | Entity name | Activity |
|---|---|---|
|
|
Device |
Appears when a time entry, note, or attachment has been created on the ticket |
|
|
Contract |
Appears when a note or attachment has been created on the contract. |
|
|
Opportunity |
Appears when a note, to-do, or attachment has been created on the opportunity. |
|
|
Project |
Appears when a note or attachment has been created on the project. |
|
|
Sales Order |
Appears when a note, to-do or attachment has been created on the sales order. |
|
|
Ticket |
Appears when a time entry, note, or attachment has been created on the ticket |
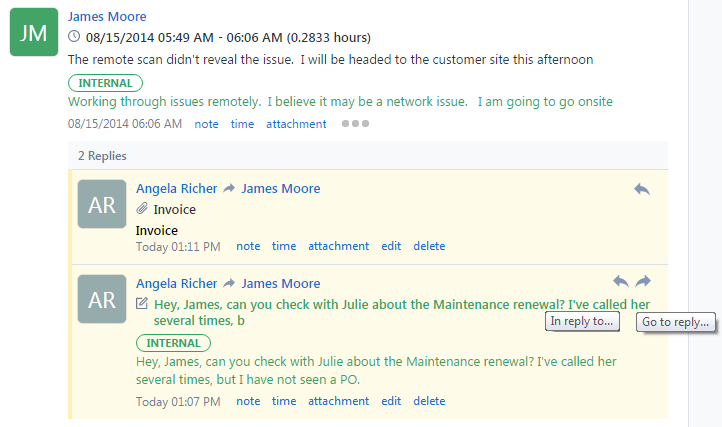
Entries on the Activity tab are grouped into conversations. An entry at the highest level is called a conversation starter. Replies to the conversation starter are indented. You can reply to a reply, but it will appear at the same level as the original item, right below the conversation starter. Autotask will load up to 500 conversation starters.
Activities are not necessarily sorted in the order they were created. To follow the thread of a conversation, hover over the conversation icons. The tooltip will either say:
- In reply to. Clicking this icon will identify the item it is the reply to (one level up).
- Go to reply. Clicking this icon will identify the reply to the item (one level down).
Both ends of the conversation are shaded yellow. Refer to Sort the Activity feed.
Depending on the type of entity, the Activity tab will show the following buttons:
| Button | Description |
|---|---|
|
All entities ( contacts, devices, opportunities, organizations, tasks, tickets, Knowledge Base articles and documents) |
|
|
New Note |
Click to add a new note to the entity.
|
|
New Attachment |
Click to create a new attachment. Refer to Adding and managing attachments. |
| Refresh |
Click to refresh the activity feed. |
|
Tasks and tickets only |
|
|
New Time Entry |
Click to enter time on a task or ticket.
Permissions:
|
|
Organizations, contacts, and opportunities only |
|
|
New To-Do |
Click to create a new to-do. Refer to Adding or editing To-dos. |
|
Devices only |
|
|
New Product Note
|
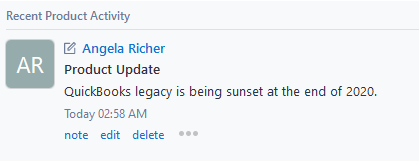
Click to add a note to the product the device is based on. This note will appear on the device Activity tab on a light gray background, with a heading of Recent Product Activity. You can filter the activity feed for such notes by selecting the Product Activity filter. |
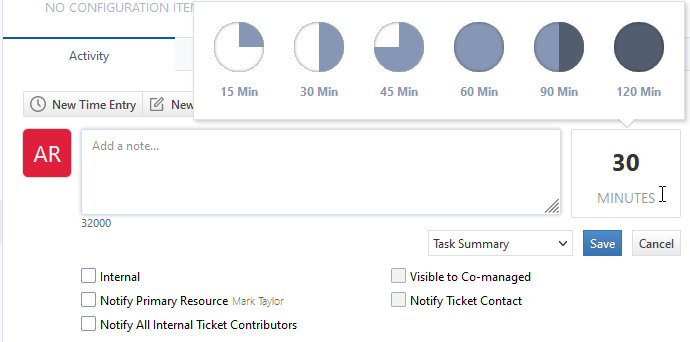
In addition to clicking New Note on the Quick Add bar or the Activity tab, you can add a note directly into the Quick Note field.
For tasks and tickets, you can also add time into the Minutes box.
Using these options is faster, but you will have fewer configuration and notification settings available to you than on the full entity note or time entry form. The Add a note... and Minutes boxes appear at the top of the activity feed.
- Complete the following:
| Field or Check Box | Description |
|---|---|
|
Text box |
Click into the Add a note... text field, and enter a note. You can use the handle in the bottom right corner to re-size the text box. The length of the note depends on the entity, and is indicated below the text field. As you type, the number of available characters decreases. NOTE If the Minutes box is populated, a time entry is created instead. |
|
Minutes box (Tasks and tickets only) |
This box appears if the ticket category’s Quick Time Entry setting is enabled, which is the default. You can create a quick time entry on the ticket by entering a number between 1 and 1439 (23 h 59 m) minutes. The field is not required, and defaults to empty. If you enter a number other than 0, a standard time entry is created as follows:
The Minutes box is disabled if the Add a note... field is empty, time entry is not allowed on a completed ticket, the ticket status is New, but a non-New status is required, or the logged-in user is not assigned to the ticket and doesn’t have a default service desk role. |
|
Note Type selector |
Note types are categories applied to notes. They organize notes based on their parent entity, function, and who they are published to. Refer to Note types for more information. The Global Notes Search can be filtered by the Note Type field. Refer to Running a global notes search. On entities where you have a choice, accept the default or select a different Note Type from the drop-down list. |
|
Internal |
This check box appears on task notes, ticket notes and both task and ticket quick notes and quick replies. It controls who can view the note.
Select the check box to hide the note from customer contacts and co-managing resources. |
|
Visible to Co-managing Users |
This check box is enabled when the Internal check box is selected. If it is selected, the note is created with the Internal & Co-managed publish type. NOTE This field is visible only if Co-managed Help Desk is enabled on the Activation page, and only shown to resources who are not co-managed. IMPORTANT When this feature is released, we will change the Publish settings of ticket and task notes and attachments to Internal & Co-managed for all tickets and tasks where the Co-managed Visibility is set to Visible. Check the box to make the note visible to co-managing resources, but not customers. |
|
Notify...(various check boxes) |
Some entities allow you to send the note using a notification email. Select the recipients you want to send a notification to. The default notification template will be used. |
- Click Save.
The Activity tab will be refreshed, and the new note will appear on the activity feed and on all note lists. The first 100 characters of the note will also be the title of the note.
NOTE When viewing an activity feed that contains Internal Only notes, co-managing users will see You do not have permission to view internal only notes (or attachments).
You can configure your user settings to either show or hide certain types of data. Your selections will be persistent until you change them.
| Check box | Description |
|---|---|
|
All entities except articles, documents, organizations, and contacts |
|
| Show System Notes |
System notes are notes that are automatically added to the activity feed, usually when someone is notified or a workflow rule fires. They are attributed to a system resource rather than a named user. You may see notes attributed to the following system resources:
To view system notes, select the Show System Notes check box. NOTE Notes generated as the result of forwarding, modifying, merging, or accepting tickets are not considered system notes, but they are read-only. They cannot be edited or deleted, but you can reply to them. NOTE This check box is disabled for users who do not have permission to view internal time entries, notes, and attachments. |
|
Tasks and tickets only |
|
|
Show Billing Data |
This check box controls the display of the billing information line for a time entry. The Billing information line displays:
NOTE The Resource Role selected on the time entry will be displayed only if Show Billing Data is selected. |
|
Opportunities, organizations, and contacts only (this is a filter, not a setting) |
|
| Show by Action Type | Click and select an Action Type to filter the notes and to-dos by action type. Other items such as tickets and attachments will remain in view. For an overview of action types, refer to Action types. |
On the Organization and Contact activity feed, you can filter the notes and to-dos by action type. The dropdown will list active action types in ascending alphabetical order.
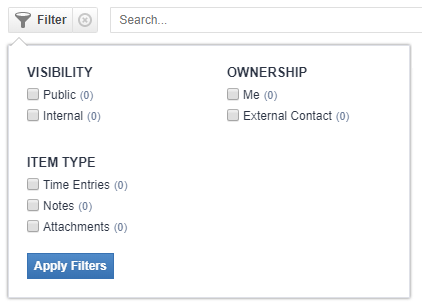
Items in the Activity feed can be filtered. Filters vary by entity type, but for each entity, there are several filter groups. Within each filter group, the condition is equal to OR. Between filter groups, the condition is equal to AND.
EXAMPLE Checking Notes, Attachments, and Me will return all notes and attachments that you have added.
To apply a filter:
- Click the Filter icon.
- Check one or more options.
- Click Apply Filters. The Activity is refreshed, and the results are displayed. The filter icon turns a dark gray.
- To clear the filter, click the clear filter icon
 to the right of the Filter button.
NOTE The filter is automatically cleared when you edit the ticket.
You can perform a string search of the Activity feed. Enter search text and press Enter to perform the search. Autotask will search the visible characters within notes, to-dos, tickets, time entries, as well as attachment names. Matching search terms will be highlighted in yellow.
IMPORTANT By default, Autotask will show 2,000 characters. You can click Show More to expose more characters, but you will never see more than 100,000 characters in the feed and, therefore, it will never search past 100,000 characters.
Items on the Activity tab can be sorted 3 ways:
- Oldest First: Conversation starters and the replies grouped under each conversation starter appear in chronological order
- Newest First: Conversation starters and the replies grouped under each conversation starter appear in reverse chronological order
- Newest First with Escalation: Conversations with the most recent reply appear at the top
The Rich Text view is not supported for notes in entity activity tabs when the text is greater than 2,100 characters. In that case, a truncated plain text version of the note initially appears, but the Rich Text version can be seen by clicking on the show more... link at the bottom of the text.
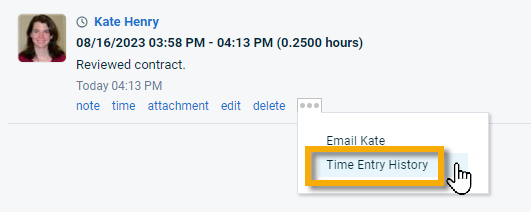
Time entries, notes, and attachments show a row of menu items at the bottom.
- note, time and attachment will add an item of the selected type as a reply to the current item.
- edit and delete refer to the currently selected item. Your security permissions determine what actions are available to you:
- All users can manage their own time entries.
- If Proxy Time Entry is enabled, admins and timesheet approvers can add and edit time entries for other users, and to delete time entries that they have created (for themselves or another user).
- Any resource with the required security level permissions can edit the Contract, Work Type, Non-Billable status, or Show on Invoice settings.
- The [Item] History is accessed from the three dot menu
 . Refer to Viewing attachment history, task and ticket note history, and time entry history.
 - To send an email to the creator of an attachment, note, or time entry, click the ellipsis icon
 and select Email [resource name].
