Adding a Quick Call
PERMISSIONS All Users
NAVIGATION My > Miscellaneous > Calendar > New > Quick Call*
NAVIGATION Calendar > Dispatch Calendar > New > Quick Call*
NAVIGATION Left Navigation Menu > Service Desk > View > Dispatch Calendar > New > Quick Call*
*You can also right-click any calendar time slot and select New Quick Call
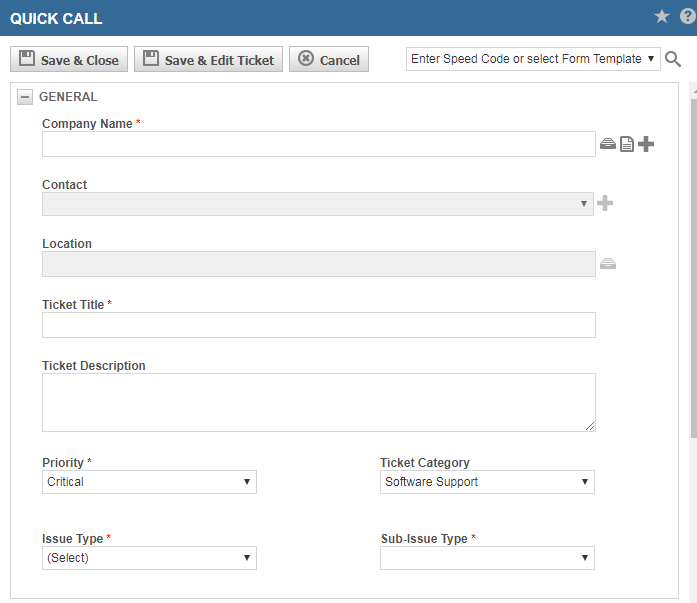
A Quick Call is not a separate type of calendar item; it is a page interface that allows you to create a ticket and schedule it into a service call all at once.
The page is a streamlined version of the New Ticket page, with additional scheduling options.
Because this is a streamlined version of the New Ticket page, it does not display all ticket fields and options. After completing the fields in the Quick Call page, you can click Save and Edit Ticket to save the Quick Call and open the Edit Ticket page to configure additional ticket options.
NOTE Multi-select UDFs will not appear on Quick Calls.
How to...
- To open the page, use the path(s) in the Security and navigation section above.
- If you have a template that you want to use for this service call, click Templates. Refer to Using form templates and speed codes.
- Enter information as described below:
| Field | Description |
|---|---|
General |
|
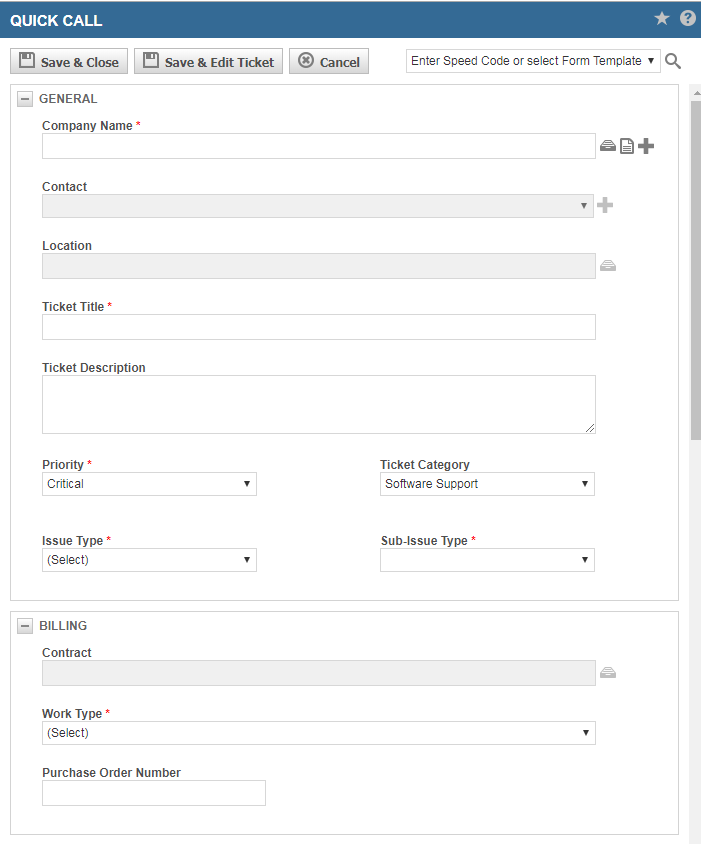
| Organization Name* | Type the organization name or us e the Data Selector. If you need to create a new organization, click the plus icon If an alert has been added to the organization you select, that alert appears in a pop-up window when you select the organization. Click Close. The alert then displays on the Quick Call form. |
| Contact |
A contact is a person at an organization who is associated with the entity you are creating or editing. This field appears on many entities that display the Organization field. You must select an organization before you can select a contact. All active contacts associated with the organization plus the current contact, even if it is inactive, are available. If the organization is a sub-organization of another organization, you can select a contact from the list of parent organization contacts that appears below a dashed line. On some entities, such as ticket and opportunity, you can click the plus icon In Add or Edit mode, start typing the name of a person or click the selector icon |
| Location | If the required work is associated with one of the organization's locations, choose that location from the data selector. The selector displays only locations associated with the specified organization. If the location field is blank, and a Contact that has an associated location is selected, the Contact's location will populate the field. |
| Ticket Title* |
This field tells the user what the ticket is about. It is most often used for ticket searches when the ticket number is not known. |
| Ticket Description |
The Description field appears on many Autotask entities. On entities like ticket, task, note, and to-do, the Description field is a core part of the data record. Wherever it is available, it tracks essential information about the record. This field is often prefaced with the entity name. For example, Quote Description. Enter a detailed description of the entity instance, the issue with which the customer needs help, or the service that they requested. |
| Priority* |
Priority is defined as the impact and urgency of the ticket compared to other tickets. It may be populated by defaults set for the ticket category or the form template used to create the ticket, or by the mapping of impact and urgency to a specific priority. Priority is always required. Select a Priority. Be aware that if your customers are using Client Portal, this field will be visible when they review their tickets. |
| Ticket Category | Select the Ticket Category to assign to the ticket, or leave the default selection. |
| Issue Type* |
The field allows you to categorize tickets for routing, workflow processing, searching, and reporting. Each issue type can have multiple sub-issue types. NOTE Issue Types are not to be confused with Issues, which are a type of task. BEST PRACTICE: Due to their important role in ticket automation, we recommend that Issue Type and Sub-Issue Type are set to Required for all ticket categories. |
| Sub-Issue Type* |
The Sub-Issue Type field allows you to further categorize tickets for routing, workflow processing, searching, and reporting purposes. Each issue type can have multiple sub-Issue types. This field is available once you select an Issue Type. BEST PRACTICE: Due to their important role in ticket automation, we recommend that Issue Type and Sub-Issue Type are set to Required for all ticket categories. |
|
Billing |
|
| Contract |
All entities:
Devices:
Tickets:
Projects:
|
| Work Type* |
Work types are billing codes for customer-facing labor. They are generally assigned at the ticket or task level and inherited by task and ticket time entries, but resources with the required security level permissions can modify them on individual time entries.
Work types can be associated with a department, which is relevant for tasks. If the task category associated with this task has enabled the setting Only allow users to assign work types that match the task's department, select a department before completing this field. The work type selector then lists only work types associated with the task's department. Refer to Work type limiting. On tickets, the ticket category will determine what work types are available if Work Type is a required field and there is a default setting. |
| Purchase Order Number |
This field appears on entities that are part of the billing workflow, and is applied to labor and charges.
Refer to Working with purchase order (PO) numbers. |
|
Scheduling |
|
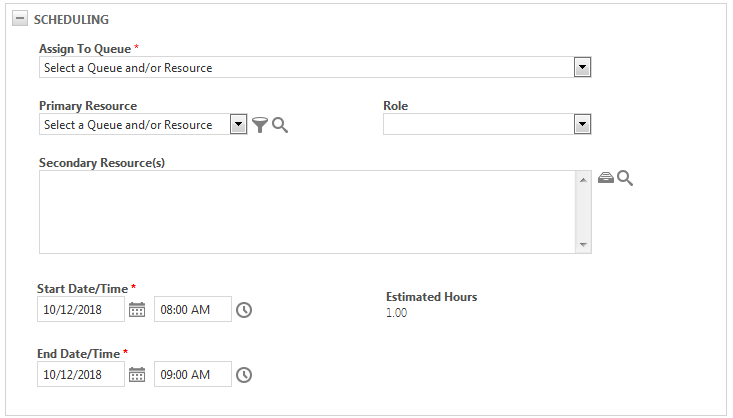
| Assign to Queue* |
Queues are used to group together tickets with something in common and resources who can work on those tickets. Tickets: Select the queue to place the ticket in. You must select a resource or a queue, or both. Resources: Add the queues the resource will be associated with. |
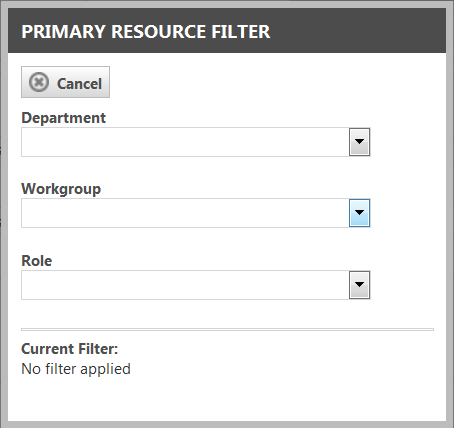
| Primary Resource | Select a Primary Resource for the ticket. The Primary Resource is the person who is responsible for the ticket. Only resources who are members of at least one queue will appear on the drop-down list. Using the filter Select the filter you would like to apply to the Primary Resource drop-down list. You can show resources for a department, workgroup, or role. When you select an option, the page closes, you are returned to the ticket, and the Primary Resource drop-down list contains only resources for the specified department, workgroup, or role. Using the Find Resource wizard You can use the |
| Role | Select the role that should be used when the primary resource performs labor on the ticket. The role determines how much your company is charging per hour for billable labor. |
| Secondary Resource(s) | Click the Secondary Resource Selector icon to add any secondary resources for the ticket. Workflow rules and reports will find and process data by primary resource only. |
| Start Date/Time* | Enter the start date. Use the up, down, left, and right arrow keys to adjust the default date to the desired date, or use the date selector. Enter the start time. |
| End Date/Time* | Enter an end date for the service call. Use the up, down, left, and right arrow keys to adjust the default date to the desired date, or use the date selector. Enter an end time. |
| Estimated Hours | Displays the estimated hours for the service call based on the start and end date/time. If the start date/time or end date/time are blank, this field will also be blank. |
|
Notification |
|
| Primary Resource, Secondary Resource(s), Account Manager, Contact | Select a check box to send an email notification to the primary resource, the secondary resources, and/or the account manager. |
| Template | Select the notification template you'd like to use for notification for this Quick Call. |
| Ticket User-Defined Fields | |
| The User-Defined Ticket Fields area displays a scrolling table list of all the available user-defined ticket fields. Some maybe required. Multi-select UDFs will not appear on Quick Calls. |
|
If the Service Level Agreement (SLA) management feature is enabled, you can set your Quick Call tickets to use an SLA for tracking service and performance data. SLA management steps through a series of "checks" to determine which SLA to use. If there is a default service desk contract for the organization or parent organization, the ticket will use the default contract's SLA. If there is not a default service desk contract with an SLA, the default SLA specified by the ticket category will be applied. If the ticket category does not have a default SLA, no SLA will be selected for the ticket.
Refer to Managing service level agreements.


