VSA 10 Integration
PERMISSIONS Security level with Admin permission to configure Kaseya Integrations. Refer to Kaseya Integrations.
NAVIGATION Left Navigation Menu > Admin > Extensions & Integrations > Kaseya Integrations > VSA 10 Integration
-
A VSA 10 Administrator must register Autotask as a Trusted Application in VSA 10. Learn more.
-
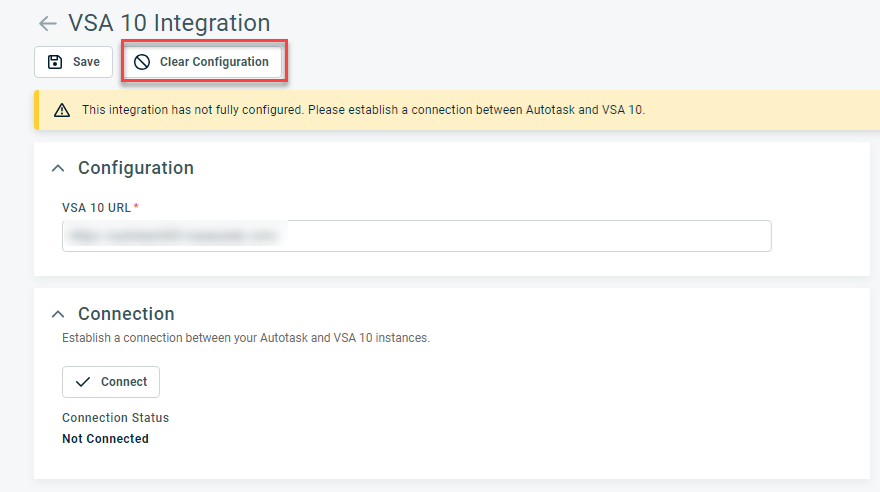
If the VSA 10 integration is enabled but Autotask has not yet been added as a Trusted Application in VSA 10, a warning message will appear.
-
VSA 10 Remote Control Manager 32 bit or 64 bit must be installed onto your machine prior to use of the Remote Control feature. Links to download the software will appear when the list of active sessions are shown. Linux is not supported.
NOTE After adding Autotask as a Trusted Application in VSA 10, you will not need to add it again unless the VSA 10 configuration is cleared. See Clear Configuration.
IMPORTANT If the VSA 10 configuration is cleared in Autotask after it has already been added as a Trusted Application in VSA 10, you must revoke the Autotask application in VSA 10 before reconfiguring the integration.
- To open the page, use the path(s) in the Security and navigation section above.
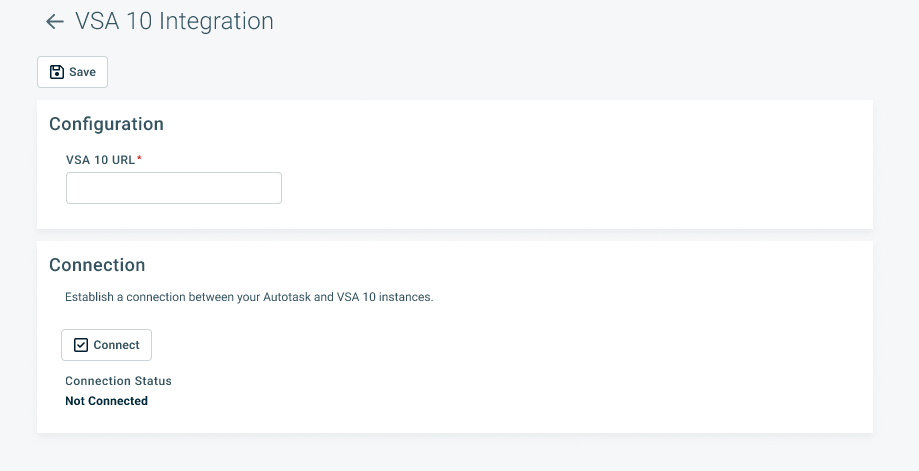
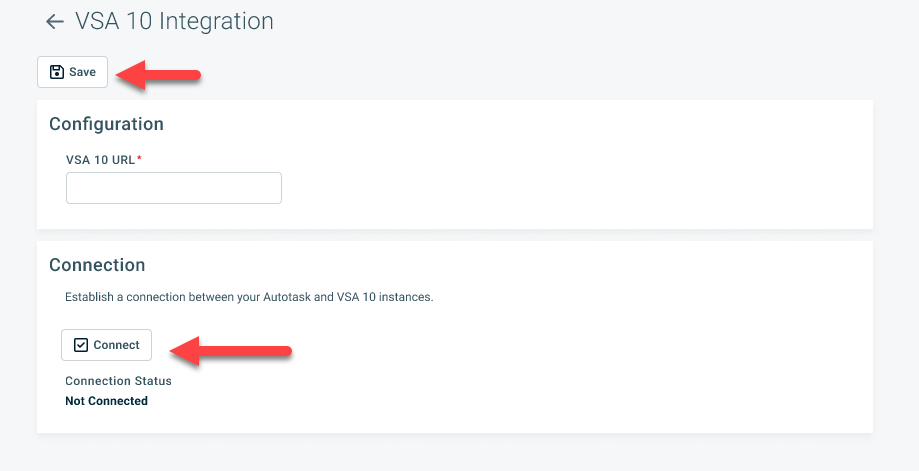
- Enter the VSA 10 URL.
- Click Save.
-
Click Connect. This opens a new window to establish the connection to VSA 10.
-
Login with your VSA 10 Administrator credentials.
-
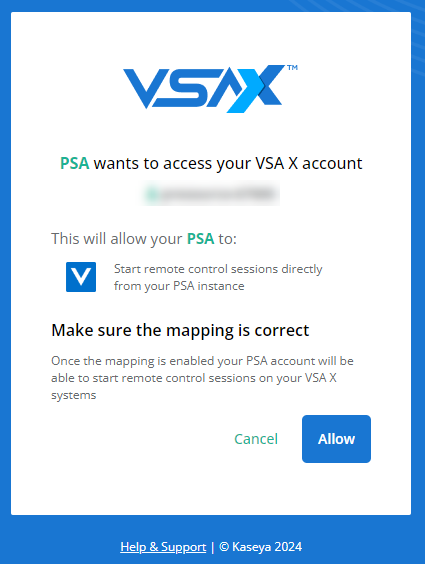
Click Allow to grant your Autotask instance access to VSA 10.
-
Your Autotask instance will now be linked and connected to your VSA 10 environment.
Overview
The Remote Control feature allows users to gain access to devices that are associated with VSA 10 directly from Autotask. This can be accomplished from the device itself or directly from a ticket that contains the associated device.
Use of the VSA 10 Remote Control feature is on an individual Autotask user basis. Any Autotask user who wants to use the remote control feature must authorize access to VSA 10 prior to using the Remote Control feature. A prompt will appear when you click the Remote Control icon.
Once the VSA 10 Integration has been enabled, you may access your VSA 10 connected devices directly from the Device or a Ticket that is associated with the device.
NOTE To view or access the Remote Control within a ticket, the VSA 10 Device insight must be visible within the Ticket Category. Refer to Ticket insights.
-
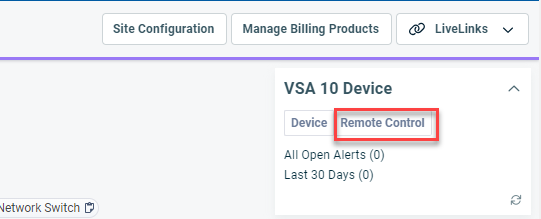
Navigate directly to a Device or to a Ticket that has a device that is associated with VSA 10 and click the Remote Control button.
-
If you have not accessed your VSA 10 account before, you will be prompted to grant authorization.
-
A list of active sessions will appear. Choose an active session or click Login to begin a new session.
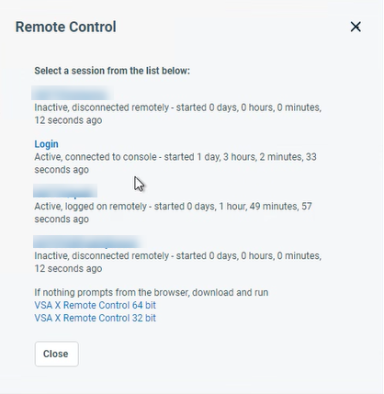
NOTE Pop-up windows must be allowed.
-
After selecting a session, Autotask task will establish the connection to the selected device.
NOTE If the device is not enabled for remote control access in VSA 10, you will receive an error message. Refer to Remote Control.
VSA 10 device mapping
Devices associated with selected (or all) contexts in VSA 10 can be synchronized with Autotask. The range of VSA 10 device fields that are available in Autotask are similar to the ones available with the Datto RMM integration, and are presented in a Details from VSA 10 section on the Device page.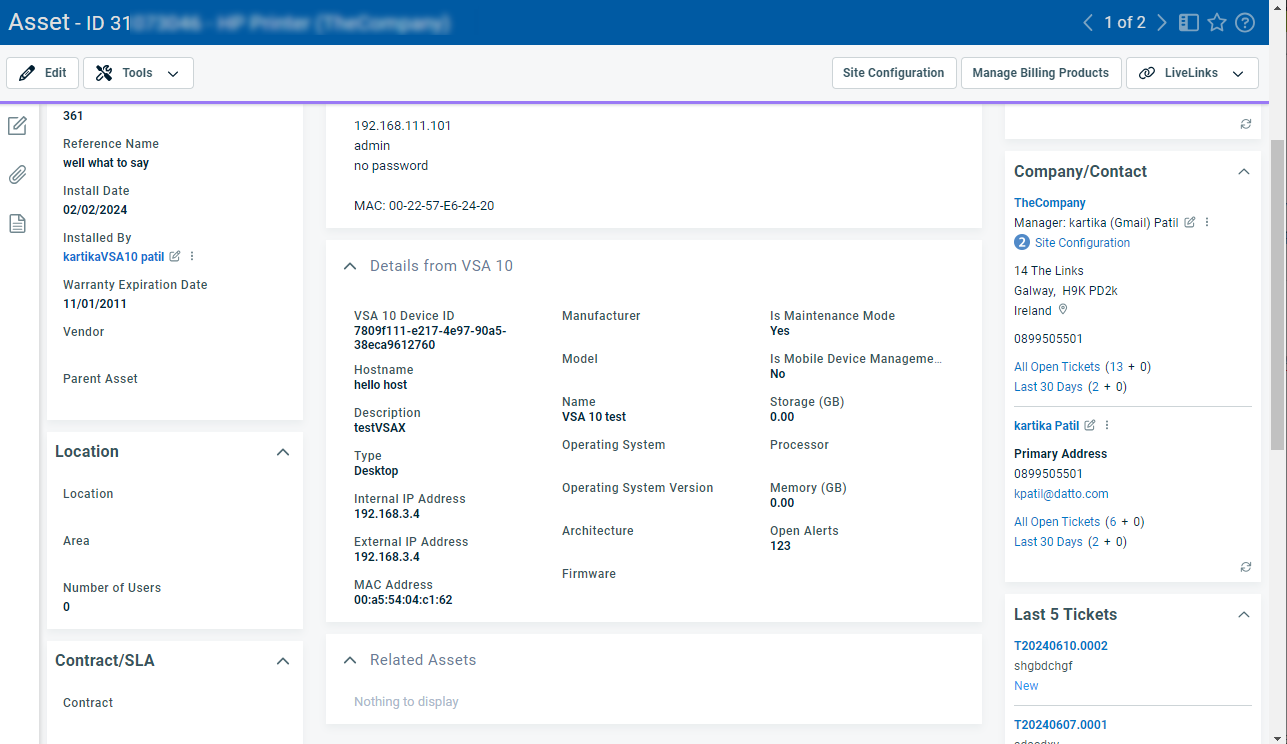
Importantly, the integration will allow the VSA 10 integration to set up the Mac Address of mapped devices in Autotask. This address is visible to other integrations such as Datto RMM or IT Glue, and will prevent the creation of duplicate devices in Autotask if multiple Kaseya IT Complete applications referencing the same device are connected.
The integration is mostly configured in VSA 10, but it requires that a dedicated API user is created for the Integration Vendor Kaseya - VSA 10 - RMM. This API user will be used by VSA 10 for authentication.
To set up the API user, do the following:
- Navigate toLeft Navigation Menu > Admin > Admin Categories > Extensions & Integrations > Other Extensions & Tools > Integration Center.
- On the Vendors tab, scroll to Kaseya - VSA 10 - RMM.
- From the context menu, select Add API User. The Add API User - Kaseya - VSA 10 - RMM window will open.
- Follow the general directions for Adding or editing an API user.
- If you are creating the API user on the Left Navigation Menu > Admin > Admin Categories > Organization Settings & Users > Resources/Users (HR) > Resources/Users (HR) > Resources/Users > New > New API User page, make sure Kaseya - VSA 10 - RMM is selected as the Integration Vendor.
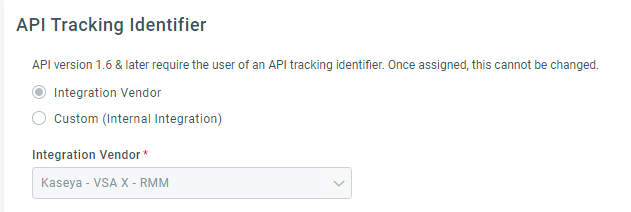
- Copy the Username (Key) and Password (Secret) into Notepad for pasting them into the VSA 10 Autotask integration page.
- Open VSA 10 and complete the integration setup.
Once the integration is configured in VSA 10, devices will be created for mapped contexts/organizations, and tickets according to notification criteria.
Once the integration has begun syncing devices to Autotask, you will notice the following changes in the Autotask UI:
IMPORTANT Devices created by VSA 10 cannot be moved, copied or deleted.
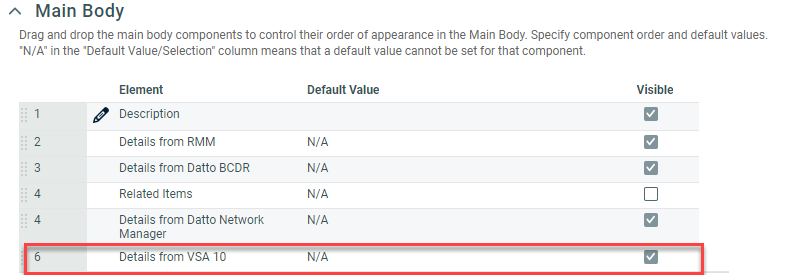
- On the Device Category > General tab, the Details from VSA 10 section appears and is visible by default.
- On the Device Category > Insights tab, the VSA 10 Device insight appears but is hidden by default.
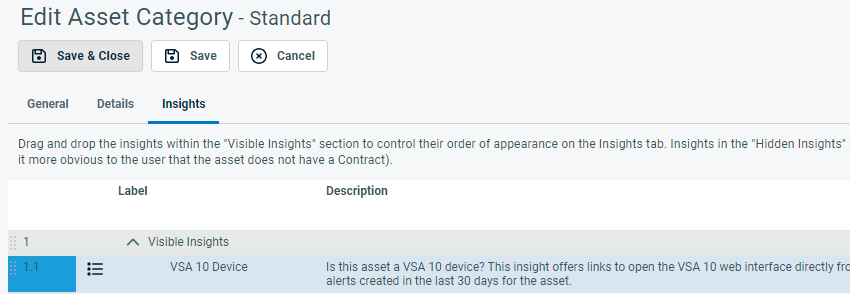
- The section and the insight only appear on the Device page if the device is in fact associated with VSA 10.
- On the Device page of devices synced from VSA 10, you will see the Details from VSA 10 section.

- The VSA 10 Device insight is available on the Insights panel of devices and tickets linked to VSA 10.
- Click on Device to open the corresponding record in VSA 10.
NOTE The visibility of that section is controlled by the device category.
- On the ticket search pages and tables, you can display the Device Associated With VSA 10 column.
- In device workflow rules, Associated with VSA 10 is available as a condition.
- In ticket workflow rules, Device Associated with VSA 10 is available as a condition.
- In Device widgets, Associated with VSA 10 is available as a grouping and filtering criteria.
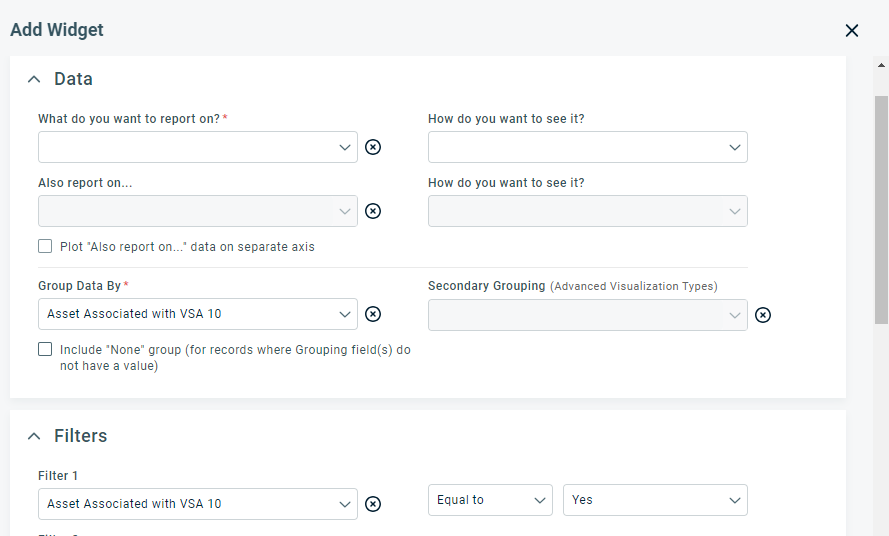
- In Ticket widgets, Device Associated with VSA 10 is available as a grouping and filtering criteria.
- Additionally, you can group and filter on all device fields populated from VSA 10 with the exception of the following:
- Maintenance Mode
- MDM Enrolled
- Device ID
On ticket boards, Device Associated with VSA 10 can be added as a filter to the "On Deck" section.
When you open a contract and navigate to the Devices tab, the Devices Under This Contract and Devices Not Under Any Contract tables allow you to select the the Is Associated with VSA 10 column from the column chooser.
Contacts cannot automatically be associated with devices. You can manually associate them on the Device Mapping page. Refer to Map the device to a contact.
PERMISSIONS This page is accessible to users who have the BCDR integration enabled, have access to the Device Discovery wizard, and have access to all devices. Refer to Mapping discovered devices to a contact and contract.
On the Device Mapping page, we added VSA 10 as a filter to the Discovered By field.
Only the integration can set the Device ID. Import, API, copying or manual creation cannot set the Device ID.
