The advanced data selector
PERMISSIONS Data selectors respect security level settings that limit access to resources, contacts and devices. Refer to Creating or editing a custom security level and Limiting resource visibility.
Many fields in Autotask use the Advanced Data Selector control for input. The fields with the Advanced Data Selector control can be recognized by the Type to search placeholder text when they are empty.

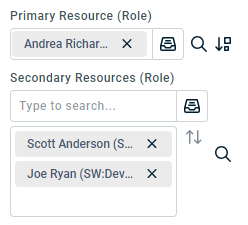
Selected items are displayed in a selector bubble.

The typeahead search is performed across multiple fields:
- For contacts and resources, the first name, last name and initials are searched
- For devices, the name, serial number, reference number, and reference name fields are searched
The type of the search is a "starts with" search.
EXAMPLE Typing "ab" would match "Abby Summers," "Louis Abner," and "Arnold Berkeley," but NOT "Tom Ahab."
All these fields also feature an entity-specific data selector window with expanded search capabilities.
Select resources and contacts
As soon as you click into a Contact or Resource field, a drop-down menu with up to 150 items will be appear. Contacts are listed grouped by Organization (identified by this icon in the drop-down list![]() ), then Parent Organization (
), then Parent Organization (![]() ), resources by Selected Queue (
), resources by Selected Queue (![]() ), then All Resources (
), then All Resources (![]() ). All active resources that are available via the Ticket Category are shown, plus the currently selected resource even if it is not active or available via the category.
). All active resources that are available via the Ticket Category are shown, plus the currently selected resource even if it is not active or available via the category.
To select a contact or resource:
- Start typing the first name, last name or initials of the contact or resource.
As you type, a decreasing number of matches is displayed. Resources are displayed once for each role they are associated with.
- To add a contact or resource, click a name. For the Additional Contacts and Secondary Resources fields, you can select multiple names.
Once a name is selected, it will appear in a bubble.

Users with the required permissions can add an organization or organization contacts right from the New or Edit Ticket page. Click the Plus icon ![]() next to the fields to open the New Organization or New Contact pages. Refer to Adding an organization and Adding and editing contacts.
next to the fields to open the New Organization or New Contact pages. Refer to Adding an organization and Adding and editing contacts.
As an alternative to typeahead, you can click the data selector icon![]() next to the field to launch a Data Selector page.
next to the field to launch a Data Selector page.
- The Contact and Primary Resource fields display the standard data selector with advanced filter options. Refer to Use standard data selectors with advanced filters.
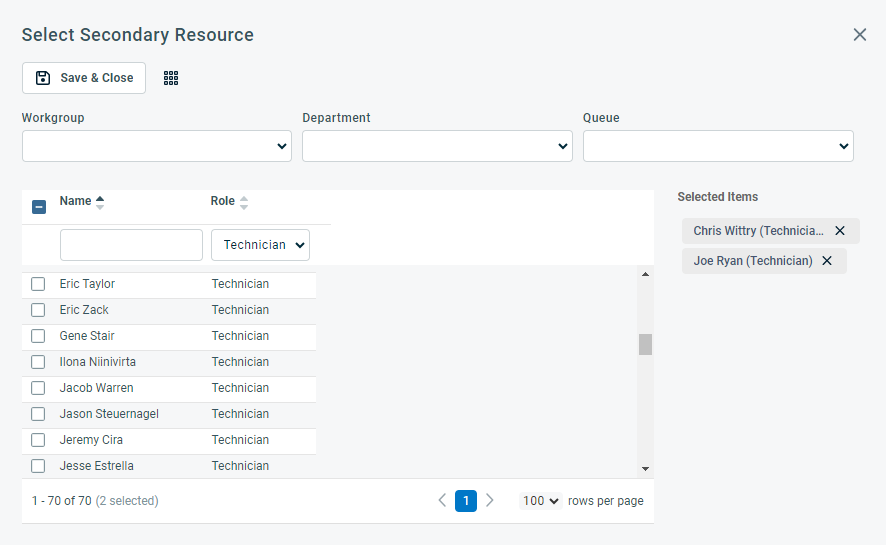
- The Additional Contacts and Secondary Resources fields, both of which allow the selection of multiple names, display a version of the Advanced Filter Data Selector.
Refer to Use standard data selectors with advanced filters.
- Resource advanced data selectors also filter by Department, Workgroup, or Queue. Click the drop-down menu and make a selection.
NOTE If your security level restricts your ability to view resources, the Department, Workgroup, and Queue filters are not available. Refer to Limiting resource visibility.
If you are looking for a resource with a specific skill set or availability, click the Find icon ![]() . This will launch the Find Resource Wizard. Refer to The Find Resource wizard.
. This will launch the Find Resource Wizard. Refer to The Find Resource wizard.
- Click the X in the resource bubble.
Select devices
As soon as you click into the Device or the Additional Devices field, a drop-down menu with up to 150 items will be displayed. All active devices for the ticket’s organization are displayed, plus the currently selected device if it is inactive.
TIP Devices for the ticket’s organization's parent organization are not displayed in the drop-down list or typeahead menus for this field, but they are available from the Data Selector window.
If no organization is yet selected, you will be prompted to either select one first or to click the data selector. If you select a device in the data selector, its organization and contact, if any, will populate the ticket.
To select a device:
- Start typing a "starts with" search string.
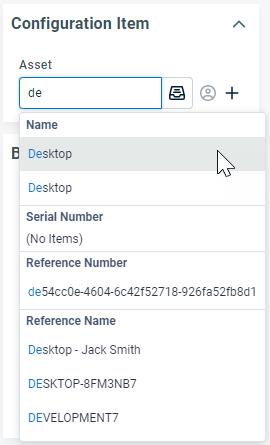
As you type, a decreasing number of matches is displayed. Matches are grouped by Name, Serial Number, Reference Number and Reference Name. A device can be listed in one or more groups if there is a match.
- To select an item, click it.
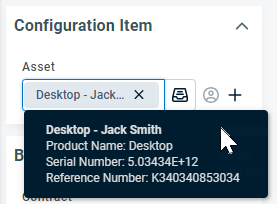
Once an item is selected, it will appear in a bubble. When you hover over the bubble, additional populated fields that are visible on the Ticket page are displayed.

As an alternative to typeahead, you can click the data selector icon![]() next to the field to launch the Select Device page. This page allows you to filter devices by multiple fields. Use the column chooser to select different fields to filter by.
next to the field to launch the Select Device page. This page allows you to filter devices by multiple fields. Use the column chooser to select different fields to filter by.
Click the desired device to select it.
To display a list of devices that are associated with the ticket contact, click the Filter by Contact icon![]() .
.


