Autotask Invoices to QuickBooks Online setup
ALERT Support for the QuickBooks Online integration will end on July 1, 2026. To avoid any potential disruption, we strongly recommend transitioning to the Smart Accounting Hub for QuickBooks Online before access to the existing integration is deprecated at a future date. Refer to Smart Accounting Hub for QuickBooks Online for more information.
PERMISSIONS You must have administrative level permissions to QuickBooks Online to correctly download and configure the Autotask to QuickBooks Online components, and access to your QuickBooks Company file.
PERMISSIONS You must use an Autotask API User (API only) security level resource to provide QuickBooks Online access to Autotask. Refer to 2. Set up an API User (API only) user account for use with the QuickBooks Online integration.
Autotask Invoices to QuickBooks Online is a stand-alone app that transfers Autotask invoices to QuickBooks Online.
Setup
IMPORTANT Please review the information in START HERE: Before you configure a QuickBooks Online Integration app.
- To access the app setup page, use the URL provided by Datto when the app was enabled.
Not enabled yet? Refer to 4. Ask Datto to enable Autotask to QuickBooks Online Integration app(s).
- Click Sign In and enter your Intuit credentials.
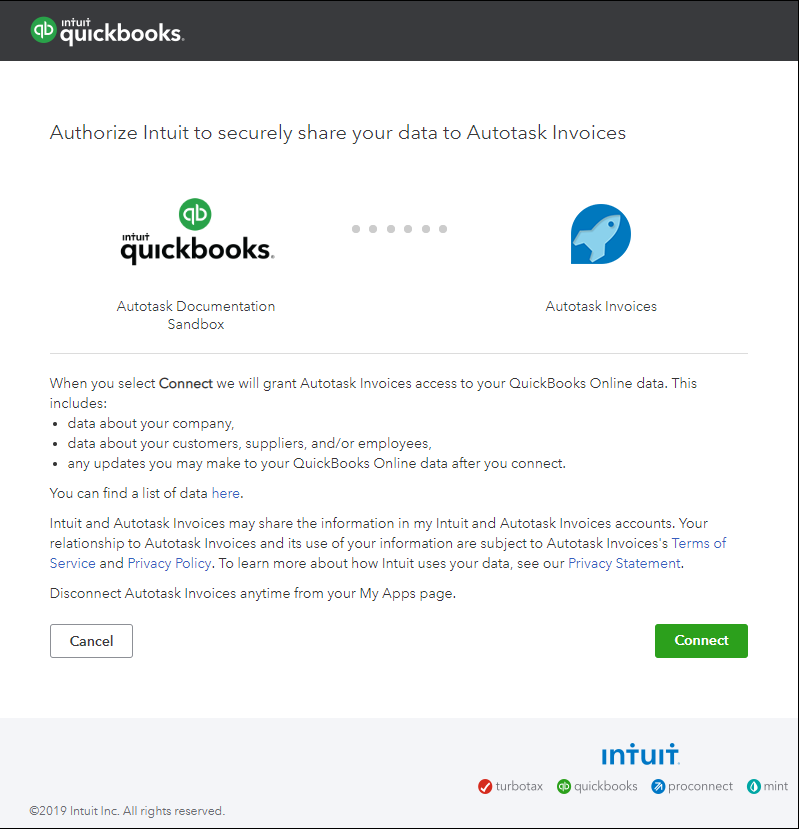
- When the integration opens in your browser, review the Authorization agreement and click Connect.
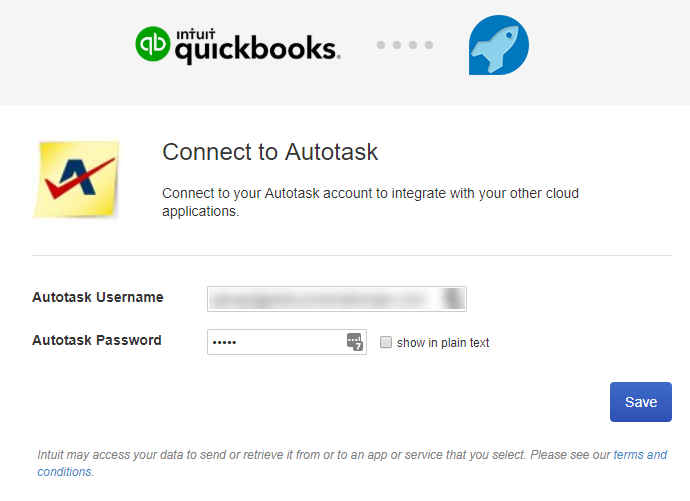
- Enter your Autotask credentials and click Save.
NOTE If the screen does not change after you click Save, refresh your browser window.
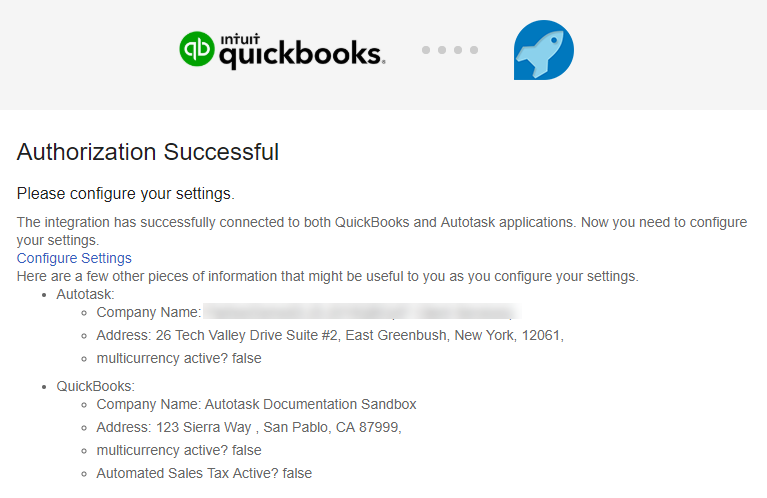
- When you see the Authorization Successful announcement, click Configure Settings.
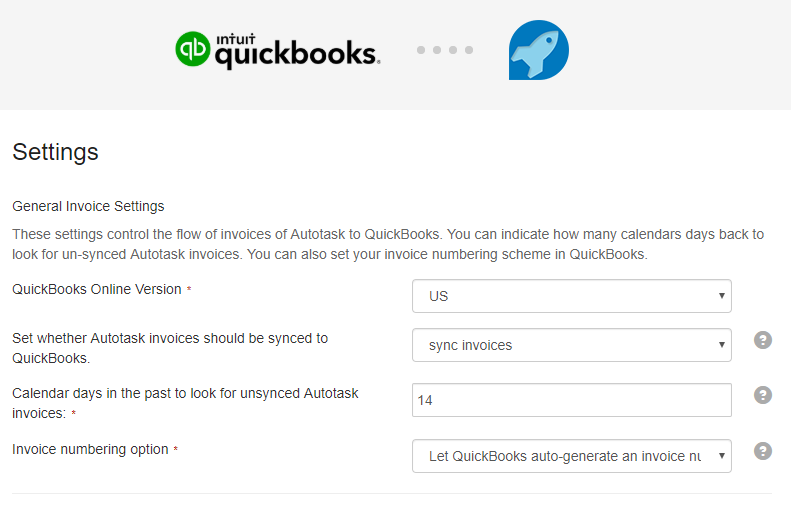
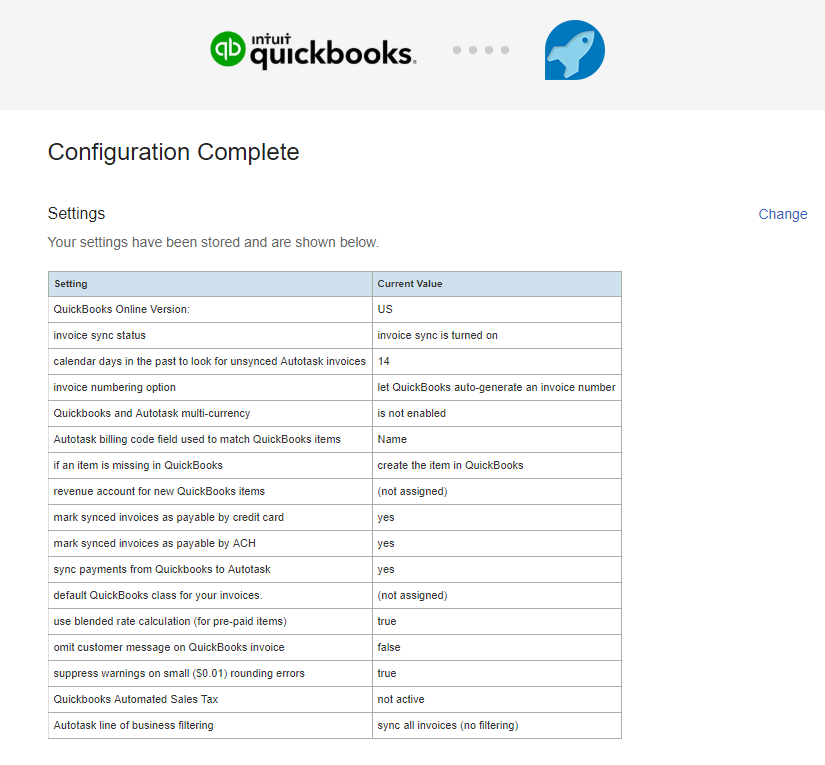
| Setting | Description |
|---|---|
| General Invoice Settings | |
| QuickBooks Online Version | Select US or Non-US. Automated sales tax calculation is available only for the US version. |
|
Set whether Autotask invoices should be synced to QuickBooks
|
Controls whether invoices should be processed into QuickBooks Online automatically.
|
|
Calendar days in the past to look for unsynced Autotask invoices
|
Enter the number of calendar days that QuickBooks Online should go into the past to retrieve unsynced invoices. The default is 14 days. TIP Best Practice is to extend the date range, in case anything got missed. |
|
Invoice numbering option
|
Select the method that QuickBooks Online should use to number invoices.
|
|
When invoices are voided in Autotask, sync to QuickBooks? |
When this setting is enabled, invoices in QuickBooks will be voided if they are voided in Autotask. The default setting is No. |
|
Calendar days in the past to look for voided Autotask invoices |
Enter the number of calendar days that QuickBooks Online should go into the past to retrieve voided invoices. The default is 14 days. |
| Invoice Item-Related Settings | |
|
Autotask billing code field used to match QuickBooks item name
|
Select the field in Autotask that QuickBooks Online should use to match to the product or service name in QuickBooks Online for invoice creation. At initial synchronization, Autotask will send an email report with the results of the match to your designated QuickBooks Online mailbox. The name of the billing code in Autotask PSA must match the name of the item in QuickBooks for them to map to each other.
Refer to BEST PRACTICE: Use the Autotask billing code External Number to match with product and service items in QuickBooks Online to help you decide. TIP Use the utility Compare Billing Codes and Items to generate the comparison report of Billing Codes to QuickBooks Online items before you begin syncing so you can make adjustments as needed. Refer to Compare billing codes and items. |
|
If an item is missing in QuickBooks
|
Select which option QuickBooks Online should use when creating an invoice where the billing item does not already exist in QuickBooks Online.
|
|
When new QuickBooks items are created, this is the revenue account they should use |
Select the income account to which QuickBooks online should assign new items created in QuickBooks Online. |
| Payment Settings | |
| For invoices created in QuickBooks, allow the customer to pay by credit card? | Please note that if selected, this setting will be applied to ALL invoices synced to QuickBooks. If there are exceptions, you must clear the setting on individual invoices in QuickBooks. |
|
Allow the customer to pay by credit card ONLY if a default payment method is set up in QuickBooks (Note, if using this setting, the above checkbox must also be selected.) |
This setting allows the invoice Online Payment Credit Card flag to be checked ONLY if the customer associated with the invoice has a default Payment method set up in their Customer Details in QuickBooks. If no default payment method is set up for the customer, the check box will be disabled, and the customer will not be able to pay by credit card. This allows you to be more selective with the permission to pay by credit card. |
| For invoices created in QuickBooks, allow the customer to pay by ACH? | Please note that if selected, this setting will be applied to ALL invoices synced to QuickBooks. If there are exceptions, you must clear the setting on individual invoices in QuickBooks. |
| Set whether payments should be synced |
This setting controls whether payments should be processed into Autotask PSA automatically.
|
| Other Sync Settings | |
|
When an Autotask PO number is available, map to this custom field: |
If you would like to map the Autotask purchase order number to a custom QuickBooks invoice field, you must first enable the field in QuickBooks. Refer to Enabling custom fields in QuickBooks Online Organization Settings. Then, map the Purchase Order Number field to the QuickBooks custom field by selecting it in the dropdown field. |
| Choose the default class (if any) that you want to use for your invoices (Transaction level tracking only) |
If you have configured invoice-level Classes in QuickBooks online, specify the class to which all invoices will be assigned, unless a line of business is mapped to a different class. |
| Choose the date format for from/to dates on the invoice | Select which format to apply to from/to dates on the invoice. |
| Leave the customer message field on the invoice empty |
|
| Suppress warnings about small rounding differences | Select this check box to ignore small discrepancies (+ or - $0.01) between the QuickBooks Online invoice totals and the totals in Autotask. These insignificant differences are caused by small decimal-accuracy rounding differences between the way that QuickBooks and Autotask calculate their totals. You will not receive an email and the error will not be noted in a log. NOTE Any larger differences in invoice totals will be treated as error, triggering an email and a log entry. |
|
Ignores invoices with a $0 total. |
Invoices in Autotask totaling $0 can now be synced or suppressed from syncing to QuickBooks. The default behavior is to sync such invoices. Select this check box to suppress $0 invoices from being transferred. |
| Use a blended rate calculation |
Cleared by default. You may want to use this feature if you use pre-paid billing features in Autotask. Select this check box if you want the integration to recalculate the rate for QuickBooks Online so that the totals match. |
|
When you enable this setting, QuickBooks will automatically email the invoices as soon as the transfer occurs, if one of the following applies:
This setting applies to all new invoices going forward. If an email address is available for some customers and not others, there is no option to mail invoices to just certain customers. |
|
| Automated Sales Tax (US Customers only) | |
|
The invoice shipping address to be used for QuickBooks Automated Sales Tax Calculations
|
Select the address that QuickBooks Online will use as the invoice shipping address when generating invoices. QuickBooks uses the shipping address location when AST calculates sales tax based on destination taxation. Currently, the invoice shipping address is a global setting; you cannot set this address at the organization level. Refer to Invoice shipping address settings for automated sales tax calculation. More information is available for this setting when you save settings and review the settings page, including a link to information from Intuit.
|
| Autotask Lines of Business | |
|
Autotask Line Of Business Sync Behavior
|
If you use lines of business you can map them to classes in QuickBooks Online.
IMPORTANT If you don't use filtering, you cannot map lines of business to classes. TIP To re-map lines of business, select the default and save, then remap. This will reliably clear the previous mappings. |
|
Autotask Lines of Business
|
This section lets you map Autotask division:lines of business to QuickBooks Online classes.
You can map multiple lines of business to the same QuickBooks Online class and sync up to 10 lines of business. |
TIP If you were using the previous Autotask to QuickBooks Online integration, and you documented your settings, use those settings.
- Click Save to complete the setup.
About Automated Sales Tax calculation
QuickBooks Online introduced a new Automated Sales Tax (AST) calculation feature in November 2017. Since that time, all new QuickBooks Online implementations have AST enabled by default. The AST feature was rolled out to existing QuickBooks Online customers in March 2019. For information about this feature and how to switch from manual to automated tax calculation, refer to Set up and use Automated Sales Tax and Switch to US Automated Sales Tax.
IMPORTANT When AST is enabled in QuickBooks Online, taxes will not be sent from Autotask.
What happens when AST is enabled?
When AST is enabled, QuickBooks online invoices are created with a Shipping address, located below the Billing address. AST uses the invoice shipping address, in combination with your local organization's address (as specified in the QuickBooks Organization settings), to determine the applicable sales tax amounts, if any.
NOTE In QuickBooks Online, you must still configure Tax Agencies for each state in which you are responsible for collecting taxes. Refer to QuickBooks Online documentation or support.
The invoice shipping address setting in this app (Autotask to QuickBooks Online Invoice Transfer app) is used solely by the AST feature. It allows you to specify the address QuickBooks Online should use to calculate taxes.
IMPORTANT Although all users see this setting, it has no impact on Invoice Transfer until Automated Sales Tax is enabled.
- If you did not run the utility "Compare Billing Codes to Items", you can do that now to check the results of the settings you selected for "Autotask field used to match items in QuickBooks".
For details on the Compare Billing Codes to Items feature, refer to Compare billing codes and items.
TIP If you run the Billing Codes to QuickBooks Online Items utility before you connect to QuickBooks Online, you can correct possible matching problems before invoice transfer begins.
- Click Connect.
You are now connected, syncing has begun, and you are ready to begin processing invoices.
The integration will immediately begin processing existing invoices.
IMPORTANT Sync time depends on the Intuit AppConnect platform's level of activity and number of items to sync and can take anywhere from 15 minutes to over an hour. Please give the integration time to complete the syncing and transfer before you check QuickBooks Online for transferred invoices.
NOTE As soon as syncing and transfer are completed, the next session is automatically scheduled.
Once your invoices have synced to QuickBooks Online and the Invoice Number field in Invoice History is populated, you can check the box next to the invoices you want to email to your customers and then click Email Selected Invoices. As an alternative, you can enable the emailing of invoices from QuickBooks. Refer to Email invoices automatically.
If needed, you can return to the Settings page to adjust your integration settings at any time. All settings can be reset on this page except the API user password. That requires a disconnect.
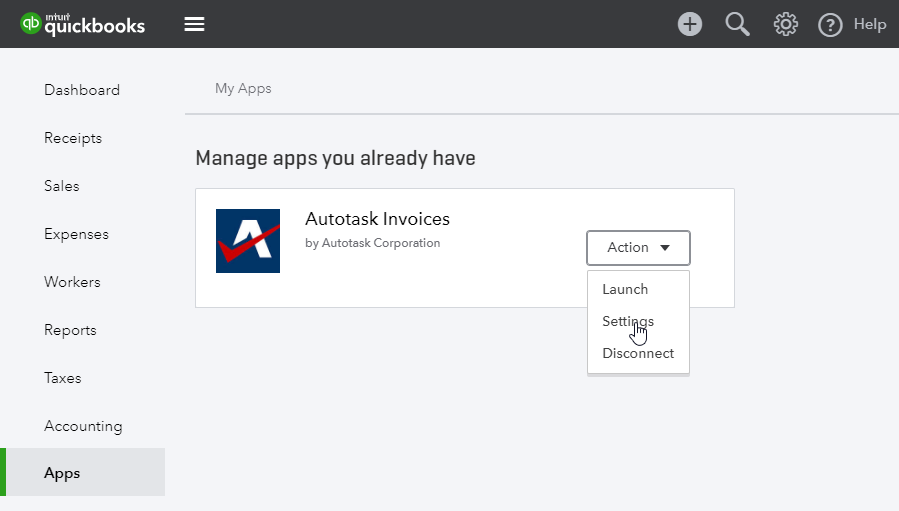
- In the navigation bar of the integration application, click Apps.
- Click the Action drop-down menu and select Settings.
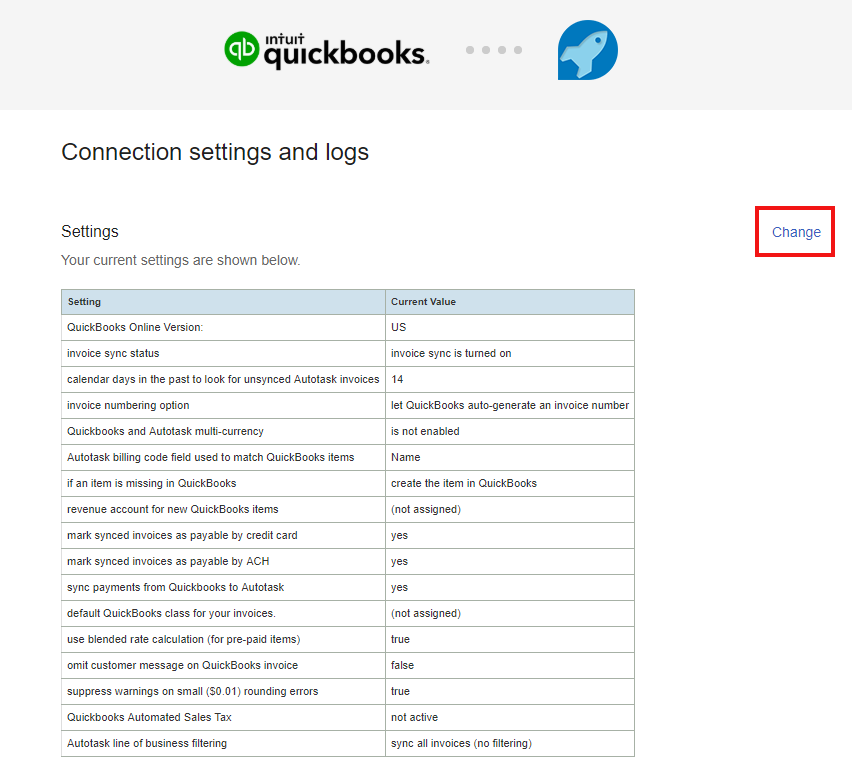
- On the Connection settings and Logs page, click Change.
The Settings page opens. This is the same Setting page that was completed in the initial setup. For details on the page, refer to The Settings page will open.
- Make changes as needed and click Save.
The PO Number present on the Autotask Invoice can now be shown on Invoices generated in QuickBooks Online. This is done by using the QuickBooks Online custom fields feature.
QuickBooks Online supports up to three custom fields on invoices and other sales forms. These fields are not enabled by default, and must be turned on in Organization Settings in QuickBooks Online.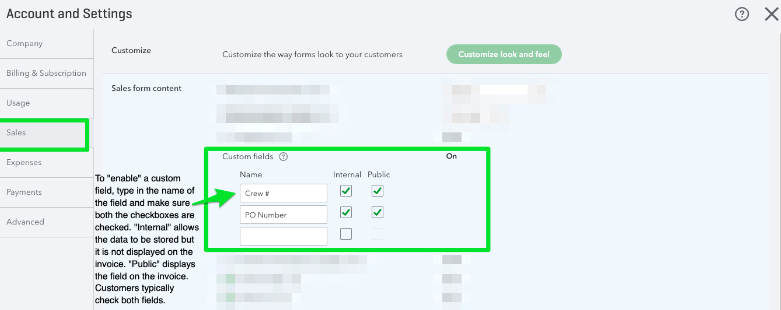
Use additional tools
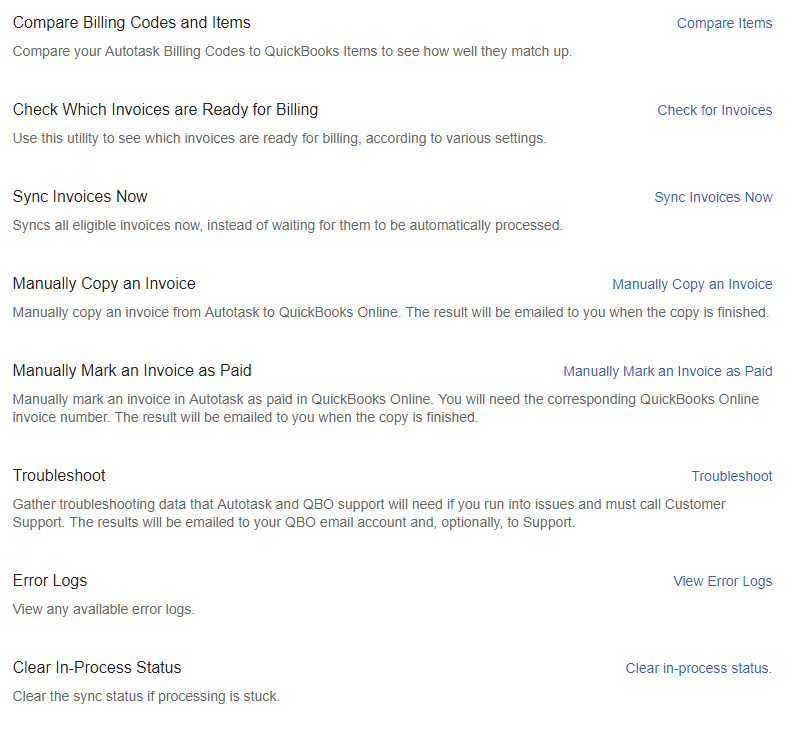
On the Connection settings and logs page, below the list of Settings, there are a number of tools to help manage the transfer of invoices between Autotask and QuickBooks Online. The tools allow you to override the settings if needed, and execute the action immediately.
Compare your Autotask Billing codes to QuickBooks items to see how they match up. You can choose to copy any missing items from Autotask to QuickBooks Online. A report of the results will be emailed to your designated QuickBooks Online mailbox when the copying is complete.
- Navigate to the Settings page and scroll to the Tools section.
- Click Compare Items.
- On the Compare or Copy page, select options from the menus.
| Field | Description |
|---|---|
| Action * | |
| Show comparison |
This option generates a report that compares billing codes and QuickBooks Online Items. When the tool finds a match, it shows discrepancies between the matched billing code and billing item, and the missing item in QuickBooks Online. Autotask PSA will send The report as an email message to your designated QuickBooks Online mailbox, along with an attached CSV version. |
| Copy missing items to QuickBooks Online |
This tool will copy missing billing code information found with the Show Comparison tool from Autotask PSA to QuickBooks Online. Autotask PSA will send a report to your designated QuickBooks Online mailbox. |
| Match Item Using | |
| Use my settings |
Select the Billing Code field to compare to QuickBooks Online Items when generating the report.
|
| Use the Autotask Billing Code Name | |
| Use the Billing Code External ID | |
| Use the External ID or use Name if blank | |
- Click Do It Now.
Use this utility to find out which invoices in Autotask will be picked up for processing the next time the integration polls. This data can be useful if you need to know whether an Autotask invoice will synchronize over to QuickBooks.
- Click Check for Invoices.
- Complete the fields as described below.
| Field | Description |
|---|---|
| Invoice Number Option |
Select which invoice numbering option the integration should use to number the invoices waiting to be processed. IMPORTANT If your invoice numbers will be generated by QuickBooks Online, Autotask invoice numbering should be turned off. Refer to Next invoice number (leave blank to disable automatic numbering). |
| Invoice Max Age | This option lets you specify the maximum age, in days, of invoices to be processed. |
| Other Email |
The process automatically sends a list of invoices that have successfully transferred from Autotask to QuickBooks Online to the email address used to connect the two. If you want this list to route to additional email addresses, you can enter them here. |
- Click Do It Now.
Since everyone does billing at the beginning of the month, sometimes it can take Intuit up to 3 hours to process your invoices. This semi-manual process uses a different API route to force a sync for an individual or a batch if invoices. It will transfer all eligible invoices at once, without waiting for the next automatically scheduled process. It will still take a couple of minutes, but you are able to generate an invoice right then.
Sync Now also provides the option to enter an alternate email address to receive the summary report on the completed sync or, if needed, any error messages triggered by the sync. The report lists all invoices processed in the batch. If no address is provided, the report goes to the QuickBooks Online email address.
To get started, you must pause automatic invoice syncing before using this tool.
- To pause the automatic invoice sync, click Change at the top of the Setting page (opposite Settings).
- In the Invoice sync status field, select "Do not sync invoices."
- Click Save at the bottom of the page.
Then you are ready to initiate an immediate sync.
- Scroll down to the tools list and click Sync Now.
- Optionally, on the Sync now page, enter an alternate email address to receive the invoice sync report.
If you do not enter an address, the report goes to the email address specified for QuickBooks Online.
- Click Sync Now.
Processing begins, and a message appears at the top of the Setting page to indicate that "An invoice batch is currently in process."
NOTE As with the automatic sync, the time required to sync all eligible invoices is dependent on the Intuit AppConnect platform's level of activity and number of items to sync. Please give the integration time to complete the syncing and transfer before you check QuickBooks Online for transferred invoices.
- When processing is complete, reset the Invoice sync status field on the Settings page to automatically sync invoices.
You can manually transfer an Invoice from Autotask to QuickBooks Online, even if a matching invoice already exists. The process sends a summary report of the results to your QuickBooks Online email address. You can also specify additional email addresses. The report shows if a copy was created, and lists the details of the invoice in report format.
You must know the Autotask Invoice ID to perform a manual transfer from Autotask to QuickBooks Online.
- Click Manually Copy an Invoice.
- Complete the fields as described below.
| Field | Description |
|---|---|
| Autotask Invoice ID | The ID of the Autotask invoice you want to copy to QuickBooks Online. |
| Overwrite |
Select this option to save the invoice copy in QuickBooks Online even if the invoice has already transferred. You may need to go into QuickBooks Online and void or delete any older instances of the invoice. If you do not select this checkbox and the invoice already exists in QuickBooks, the integration does not create a new copy. The summary report indicates that the copy failed; no data was saved to QuickBooks Online because it did not overwrite the original invoice. |
| Additional Email | The integration will automatically send a summary report to the email address used to connect QuickBooks Online to Autotask. If you want this list to copy to additional email addresses, you can enter them here. |
- Click Sync Invoices Now to complete the action.
- Check your designated QuickBooks Online mailbox and any additional mailboxes for the summary report.
- Click Manually Mark an Invoice as Paid.
- Complete the fields as described below.
| Field | Description |
|---|---|
| Invoice Number | Enter the invoice number you want to mark as paid. |
| Date | Enter the date the payment occurred. If left blank, the date used will be today's date. If provided, the date must be entered in YYYY-MM-DD format. |
- Click Do It Now.
This utility provides troubleshooting information to Autotask Customer Support if problems with the QuickBooks Online integration occur. It does not provide information that is helpful at the user level. The troubleshooting log is automatically transmitted to the email address used to connect QuickBooks Online to Autotask.
If an error occurs in the integration, AppConnect automatically sends an email to the email address used to connect QuickBooks Online to Autotask. The message includes error information. You can also find this error information in the integration, under Error Logs. To use this tool, click View Error Logs at the bottom of the Check Settings page.
If an invoice "add" fails and your integration is configured to ...
- use QuickBooks Online to assign Invoice numbers, the invoice number in Autotask will be updated to “ERROR”. To reprocess the error, clear the invoice number field in Autotask and the integration will automatically try to reprocess the invoice.
- use Invoice numbers assigned by Autotask, you will need to log into Intuit QuickBooks and, from the My Apps page, select Settings for the Autotask Invoices app. Then, manually send the invoice again.
If you are unable to identify the issue from the information in the Error Log, contact Kaseya Helpdesk.
(Technical/Troubleshooting use only). In the event that a sync appears "stuck", this process clears the internal processing status so that processing can resume.
- To clear the status, click Submit.
Additional Resources
- QuickBooks Online invoicing tools (external resource)
