START HERE: Before you configure a QuickBooks Online Integration app
ALERT Support for the QuickBooks Online integration will end on July 1, 2026. To avoid any potential disruption, we strongly recommend transitioning to the Smart Accounting Hub for QuickBooks Online before access to the existing integration is deprecated at a future date. Refer to Smart Accounting Hub for QuickBooks Online for more information.
PERMISSIONS You must have administrative level permissions to QuickBooks Online to correctly download and configure the Autotask to QuickBooks Online components, and access to your QuickBooks Company file.
Before you configure a QuickBooks Online Integration app, make sure you have gone through the following steps.
If your local organization is new to Autotask, do not begin to set up the QuickBooks Online integration until your Autotask implementation has been completed. The integration relies on user data and processes that are configured during implementation.
Autotask provides a special security level designed for use with integrations, called API User (system) (API-only). Users who are assigned this security level can access Autotask via the Web Services API to conduct integration transactions, but there is no access to the Autotask user interface. There is no per seat charge for user accounts set up with this security level, and they can be exempted from the otherwise mandatory password reset.
IMPORTANT When setting up your QuickBooks Online to Autotask integration, you must use an Autotask API User (API only) security level license to connect to the QuickBooks Online integration. Click the Integration Vendor radio button and select Autotask - QuickBooks Online from the drop down. Refer to The API tracking identifier.
TIP As a BEST PRACTICE, we recommend that you set up a separate user account with this security level for each integration you implement (example: QuickBooks Online API User). You can use the API User (system) (API-only) security level, or you can copy and edit the security levels for each integration's specific requirements.
For more information, refer to API User (system) (API-only).
Before you begin with the configuration of one of the integration apps, have your QuickBooks Online account set up and ready to run. You will need Admin level Intuit credentials and access to QuickBooks Online to complete the configuration of the Autotask to QuickBooks Online integration.
The Autotask Invoices to QuickBooks Online app supports Autotask Multi-currency. Currently, Multi-currency is not available for the Expenses or the Purchase Orders to QuickBooks Online apps.
IMPORTANT Multi-currency must be enabled for both Autotask and QuickBooks Online in order to successfully transfer data.
When using Multi-currency with the Invoice app, keep the following conditions in mind:
- For all transactions, the currency specified for the Autotask Multi-currency account must match the currency specified for the matching customer in QuickBooks Online or an error will result.
- When the integration creates a new customer in QuickBooks Online, it will assign the currency specified in Autotask. The currency specified in Autotask must be supported in QuickBooks Online.
IMPORTANT Once a currency is assigned in either Autotask or QuickBooks Online, it cannot be changed.
The QuickBooks Online integration currently has three separate apps, Invoice Transfer, Expense Transfer, and Purchase Order Transfer. Each app must be enabled and configured separately. To access the app (or apps), you must submit a request via Kaseya Helpdesk.
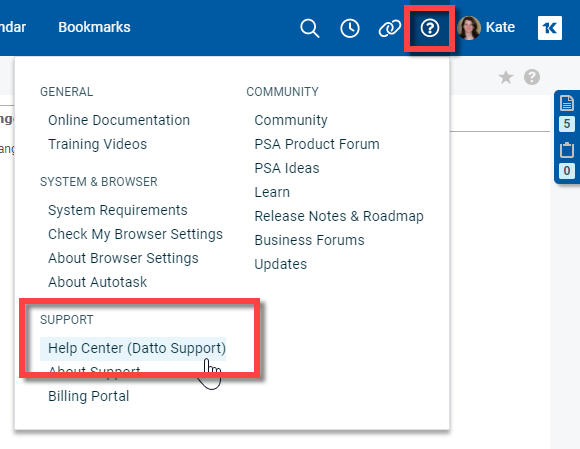
- Click the Help icon
 on the right side of the Autotask UI top navigation bar and select Help Center (Datto Support).
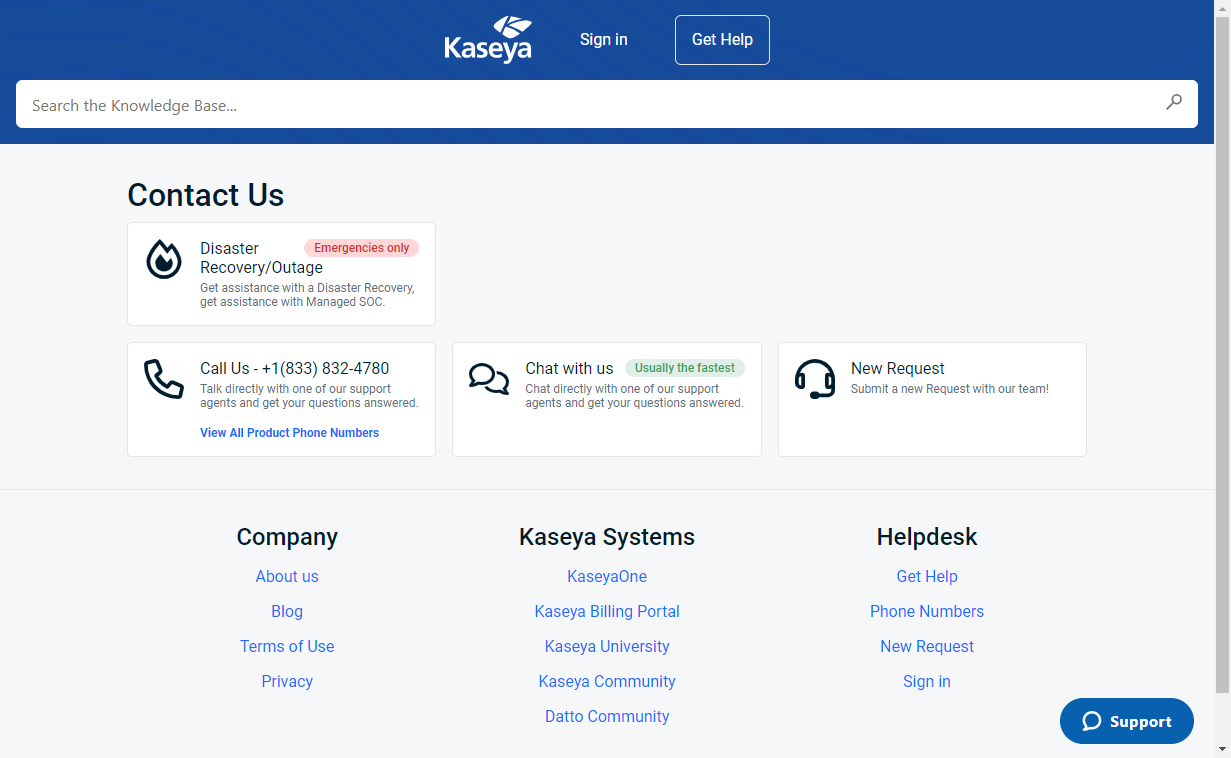
- Click Get Help in the upper-right corner of the Kaseya Helpdesk page.

- Select New Request.

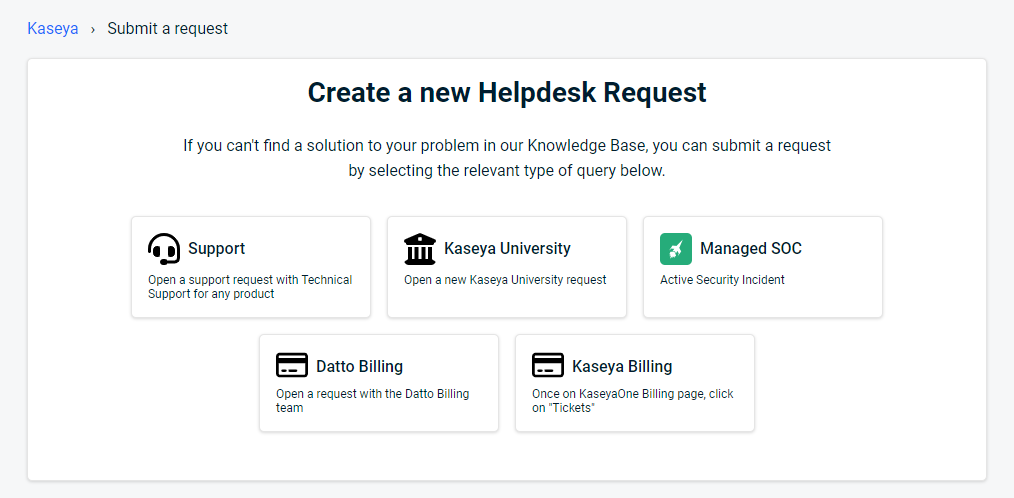
- Select Support.

- Complete the form and click Submit.
When your request has been processed, you will receive an access URL for each app that you requested.
IMPORTANT Be sure to indicate which QuickBooks Online app (or apps) you want to enable.
Intuit allows multiple users to access your instance of QuickBooks Online, but only one user can set up and configure each integration app. This person is also the only one who will be able to modify the app settings in the future. It is therefore very important that the right person is doing the initial setup for each app.
You must do one of the following:
- Designate one person to do all integration setup and configuration tasks
- Share the credentials of the one QuickBooks Online API user you created for this integration
- Create a separate user account with an API-only security level for each person who is managing an app
This step can be skipped if you have data in Autotask, but are starting with a clean slate in QuickBooks Online. If you have data in both applications, you must make sure that customers, items and payment terms are mapped correctly, or you will create a lot of duplicate data.
NOTE The Primary Contact in Autotask will be transferred to QuickBooks Online.
Autotask and QuickBooks Online must both be able to reference the same organization in order to process invoices between the two systems. When matching Autotask organizations and QuickBooks customers, the integration compares the Autotask Organization Name field with the QuickBooks Online Customer Display Name.
If you already have Customers in QuickBooks Online, you should ensure that each is matched to its corresponding Autotask organization via the Organization Name field. If you do not have your customers in QuickBooks online, the integration will create them when the first invoice for each organization is processed, so there is no need to import them into QuickBooks Online.
The QuickBooks desktop extension was designed to support the multi-level hierarchies of the QuickBooks Item:Subitem list, Customer:Job list, etc. We used the tilde ~ as the character that would be parsed as a colon (the character in QuickBooks that separates the levels). Refer to Using the tilde for mapping sub-items.
QuickBooks Online does not recognize the tilde character. In both Autotask and QuickBooks Online, the tilde must be removed wherever it was used.
During Autotask implementation, your local organization set up billing codes to categorize items that are tracked as part of your local organization's financial records. The QuickBooks Online integration uses billing codes to match Autotask invoice line items with products and services in QuickBooks Online.
Each billing code has a Name as well as other attributes including an optional “External Number”. Although the integration can use the billing code Names to match up with Product and Service Items in QuickBooks Online, using the Billing Code External Numbers is a more powerful alternative:
- You can use the External Number field names for product and service items you have already setup in QuickBooks Online. Also, when you add new items, you are not restricted to the names you use in Autotask.
- And, perhaps the more powerful advantage, when you use the External Number, you can consolidate Autotask Billing Codes into a smaller set of Product and Service Items in QuickBooks Online. For example, in QuickBooks Online, you may only need to know which items are “Labor”. In Autotask, for management purposes, you will probably need to distinguish different types of "Labor", for example, on-site vs. remote. Simply assign “Labor” as the External Number for each labor type Billing Code to consolidate them under "Labor" for QuickBooks Online.
You can compare billing codes you’ve set up in Autotask to the items configured in QuickBooks using the Compare Billing Codes and Items utility. Run this utility prior to turning on the invoice sync. An email will be sent to your designated QuickBooks Online mailbox, containing a summary of the current billing code and item matches, based on the current data in both apps. Then, you can make additional adjustments to billing code names or external numbers in Autotask, as needed, and reduce the occurrence of item-related errors when syncing invoices. Refer to Compare billing codes and items.
To transfer Autotask payment terms to QuickBooks Online invoices, you must set up identical payment terms in both applications. Then, select the payment terms in the QuickBooks Online invoice template that match the payment terms for the Autotask invoice. Payment Terms in Autotask are Admin finance and billing settings; refer to Payment terms.
For the integration to work, you will need to disable automatic invoice numbering. The integration is detecting the blank invoice number field as a qualifier of what is ready to sync. Refer to Next invoice number (leave blank to disable automatic numbering).
Next Steps
You are now ready to set up a QuickBooks Online Integration apps. Each app must be configured separately. Use the links below to access the configuration details for each app.
- Autotask Invoices to QuickBooks Online setup
- Autotask Expenses to QuickBooks Online setup
- Autotask Purchase Orders to QuickBooks Online setup
If you need to disconnect an app, refer to Disconnecting a QuickBooks Online Integration app.


