The Invoices tab
PERMISSIONS Permission to access to Contracts, or setting Allow Account Managers and Account Team Members to access Organization Detail > Financials and the Executive Summary Report for their organizations to enabled.
NAVIGATION Left Navigation Menu > CRM > Search > Organizations > click Search > click an organization name > accessory tabs > Invoices
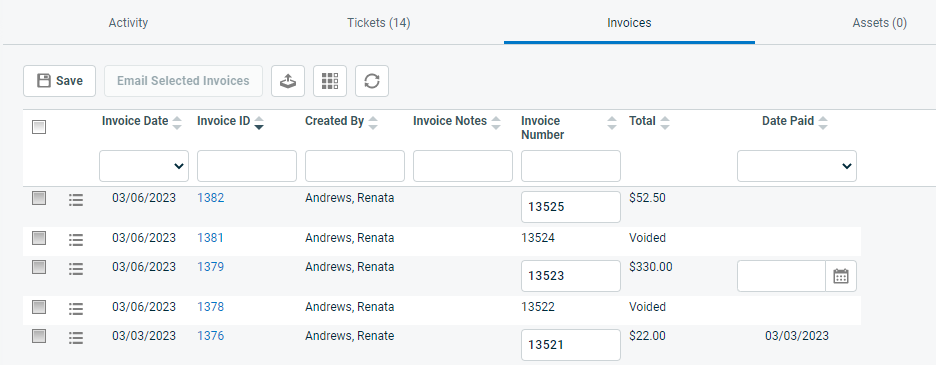
The Invoices tab appears on the accessory tabs of the Organization page. It contains the invoice history for the selected organization. To open the page, use the path(s) in the Security and navigation section above.
| Button | Description |
|---|---|
|
The results tables of a number of entity searches allow you to edit some columns right in the table. To keep your changes, you must click Save.
|
|
|
Email Selected Invoices |
To email invoices to a customer, Enable Invoice Emailing from Autotask must be selected on the Invoice Settings page. Refer to Invoice Emailing. To email invoices:
NOTE You can email up to 200 invoices at once. If your selection exceeds 200 rows, a message is displayed to let you know that you have selected over 200 invoices.
|
|
PERMISSIONS By default, Export is available to users with Admin security level and disabled for all others. It can be enabled for other security levels. Refer to Can export Grid Data. NOTE When exporting to CSV: To ensure consistent date/time formatting in the CSV output, we strongly recommend that the user’s date/time format settings in Autotask be identical to the Windows date/time format settings of the computer performing the export. This will prevent conflicts in how the software that generates the report interprets the date/time format.
NOTE Note that only the selected columns of the first 5,000 records will be exported. IMPORTANT The export file does not contain all fields that are required to re-import the data using the data import templates, and the data headers do not match. |
|
|
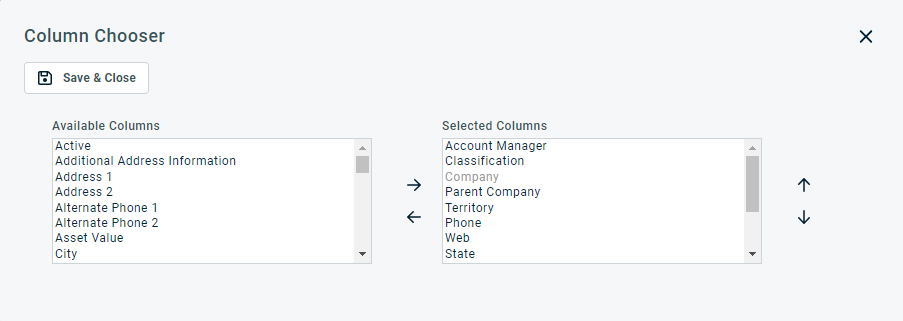
The Column Chooser allows you to customize search results tables throughout Autotask. It determines the following:
NOTE Column Chooser settings on search results tables and some standard reports are part of the user settings stored on the Autotask server. You can log in from any computer and have your column chooser settings applied to your Autotask session. To clear the data stored in your Autotask instance and reset the column chooser settings to the Autotask default settings, click Reset Settings in My > Miscellaneous > Settings. To customize the table, do the following:
Columns appear either in the Available Columns or the Selected Columns panel.
NOTE Top-to-bottom order in the Selected Columns list becomes left-to-right order on the Search Results list.
TIP If the characters + # appear after the column name, then that column may have multiple items returned for some rows. If that occurs, the first item will appear in the row followed by + and the number of additional items returned. To display the list of additional items, hover over the item in the column. |
|
|
Click the refresh icon |
| Column Name | Description |
|---|---|
| Batch ID | A number that is associated with all individual invoices that were processed together. |
| Check All / Check None | Selecting at least one invoice enables the Email Selected Invoices button on the button bar. This check box is disabled for organizations that do not have invoice emailing enabled, and for invoices that have been voided. |
| Created By | The name of the user who processed the invoice. |
| Date Paid |
The Date Paid may be populated or editable. It can be populated in the following ways:
Once the field is populated, Payment Processing is disabled. If the field is empty, it can be edited in the table. Select a date from the calendar widget, or enter the date in the Date Paid column in MM/DD/YYYY format. This field is available in the Approved and Posted and Recurring Contracts Profitability LiveReports category. It can be displayed on the report, as well as filtered on. |
| Emailed | A check mark indicates the invoice has been emailed to the customer. |
| Invoice Date | The date that appears on the invoice as the Invoice Date. It defaults to the date the invoice was processed, but it can be edited during the invoice processing. |
| Invoice ID | The unique Autotask system ID for each invoice. This ID cannot be changed. |
| Invoice Notes | Invoice Notes entered on the first page of the Process Selected Invoices dialog box. |
| Invoice Number |
This field can be edited in the table. Invoice number you assign to the invoice either manually, or by enabling automatic invoice numbering using the Next invoice number (leave blank to disable automatic numbering) setting. For QuickBooks users, it will be the QuickBooks invoice number that was synched back to Autotask. |
| Line of Business | Displays the line of business associated with the invoice. NOTE If the invoice contains items from multiple lines of business or any items with no line of business, then it will not be associated with any line of business. |
|
Purchase Order Number |
The invoice's purchase order number, if one is assigned. |
| QuickBooks Transfer Date |
This column shows the date and time the invoice was transferred to QuickBooks. If the invoice has been generated and is ready to transfer, but the web connector has not yet been run, the status will show as Pending.
If a pending invoice fails to transfer, it will remain in a pending state, and every time the web connector runs we will attempt to transfer the failed invoice. We will keep trying until the transfer succeeds or until you cancel the transfer. NOTE You can display a search filter for the Transferred to QuickBooks Column. Status options are: [blank], Not Transferred, Pending, Pending/Failed, Transferred. |
| Total | The invoice Total Amount. NOTE If Multi-currency is enabled, totals are displayed in the customer currency. You can also filter invoices by customer currency. |
| Voided | A check mark indicates the invoice has been voided. Voided invoices cannot be marked as ready to transfer, or canceled. |
You manage invoices from the context menu.
| Option | Description |
|---|---|
|
View |
|
| Invoice / All Invoices in this Batch | Invoices will look exactly like they did when they were originally created, because the Bill To Address fields and the internal address fields are stored in your Autotask instance at the time they were processed. The one exception is the logo—if your change your logo, the new logo will appear on all past, present, and future invoices. If you open a batch of invoices, you are able to scroll through the list, or jump to an invoice by organization using a drop-down menu. Refer to Viewing invoices. |
| Invoice Settings | If a single invoice is selected on the Invoice History page or invoices are viewed on the Invoices accessory tab, you can view the Invoice Settings page for the organization. Refer to The Invoice settings tab and page. |
|
General |
|
| Export All Invoices in this Batch as XML | Refer to Exporting invoices to generic XML. |
| Clear Web Service Date | Available only to users with access to the Web Services API and only when the Web Service Date column is visible. Click this option to clear the Web Service Date from the invoice. If this date was added by a third party invoice integration to indicate that the invoice was processed, clearing the date allows the integration to re-process the invoice. |
|
Resubmit Invoice to Network |
Click this option to resend an invoice that failed. The Fallback Email Address will be used if the Routing Network submission failed. Refer to e-Invoicing. |
|
Download e-Invoice |
Click this option to download the e-invoice to your local machine. |
|
Payment |
|
|
Process Payment |
Click this option to process a payment for the selected invoice. Refer to Processing a payment. Once a payment has been applied to the invoice and the Paid Date has been populated, this option is disabled. The Paid Date can be populated manually, by an invoice transfer to QuickBooks, or via the API. |
|
Void |
|
| Void Invoice / Void All Invoices in this Batch | Refer to Voiding an invoice. |
| Void Invoice & Un-Post Items | This option allows you to void a single invoice and un-post all billing items on it in a single step. It combines Voiding an invoice and Un-posting invoices. All items on the invoice are moved back into the respective categories on Contracts > Approve and Post, where they can be edited and re-posted. NOTE You may only void 100 billing items at a time. If you void an invoice with more than 100 items, you will need to manually un-post this invoice's items. |
|
QuickBooks (Web Connector) |
|
|
Set as Ready to Transfer to QuickBooks / Set all Invoices in Batch as Ready to Transfer to QuickBooks |
This will set the status of the invoice or invoice batch to Pending. The invoice will be transferred to QuickBooks the next time the web connector is running. NOTE You can mark invoices as ready to transfer even if they have already been transferred. A duplicate invoice will be created in QuickBooks, and the new invoice number will be transferred back to Autotask. |
|
Set as Not Ready to Transfer to QuickBooks / Set all Invoices in Batch as Not Ready to Transfer to QuickBooks |
This will remove the Pending status form the invoice or batch. No action will be taken unless and until the invoice or batch are marked as ready to transfer again. NOTE If you are a US customer who is calculating taxes in Autotask using the TaxJar integration, a TaxJar Exception will prevent the successful creation of the invoice and its transfer to QuickBooks. Refer to TaxJar warning banner. |


