The Sub-Organizations tab
PERMISSIONS Security level with access to CRM, and Edit All or Edit Mine permission for associated organization.
NAVIGATION Left Navigation Menu > CRM > Search > Organizations > click Search > click an organization name > accessory tabs > Sub-organizations
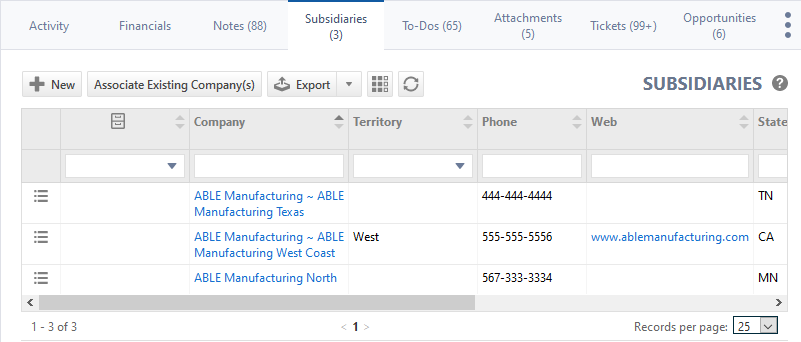
The Sub-Organizations tab appears on the accessory tabs of the Organization page. On this tab, you can view and manage existing sub-organizations and create new ones. For more about sub-organizations and how they are different from locations, refer to Organization locations and parent/sub-organization relationships.
To open the page, use the path(s) in the Security and navigation section above. If the Sub-Organizations tab is not displayed, select it from the overflow menu. Refer to Customizing and managing organization accessory tabs.
| Tool Button | Description | ||||||
|---|---|---|---|---|---|---|---|
|
|
Many Search pages (but not the widget drill-down tables) allow you to create a new instance of the selected entity. This button is visible before you execute a search:
For help with populating the fields, refer to the context-sensitive Help of the page that opens. |
||||||
|
Associate Existing Organizations |
On the Sub-Organizations tab, you can associate organizations as sub-organizations of the current organization.
If this is the organization's first sub-organization, it turns it into a parent organization that can no longer be selected as a sub-organization.
|
||||||
|
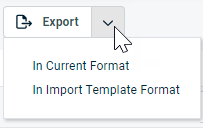
PERMISSIONS By default, Export is available to users with Admin security level, and disabled for all others. It can be enabled for other security levels. Refer to Can export Grid Data. NOTE When exporting to CSV: To ensure consistent date/time formatting in the CSV output, we strongly recommend that the user’s date/time format settings in Autotask be identical to the Windows date/time format settings of the computer performing the export. This will prevent conflicts in how the software that generates the report interprets the date/time format. IMPORTANT Fields related to billing products for devices and contacts will not be exported.
NOTE Only the first 5,000 records will be exported. |
|||||||
|
|
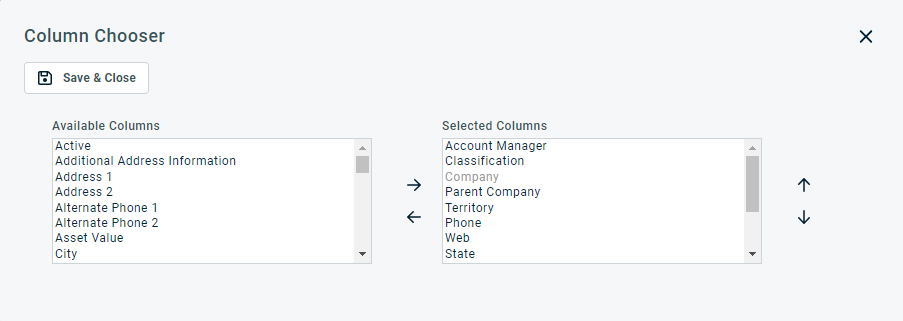
The Column Chooser allows you to customize search results tables throughout Autotask. It determines the following:
NOTE Column Chooser settings on search results tables and some standard reports are part of the user settings stored on the Autotask server. You can log in from any computer and have your column chooser settings applied to your Autotask session. To clear the data stored in your Autotask instance and reset the column chooser settings to the Autotask default settings, click Reset Settings in My > Miscellaneous > Settings. To customize the table, do the following:
Columns appear either in the Available Columns or the Selected Columns panel.
NOTE Top-to-bottom order in the Selected Columns list becomes left-to-right order on the Search Results list.
TIP If the characters + # appear after the column name, then that column may have multiple items returned for some rows. If that occurs, the first item will appear in the row followed by + and the number of additional items returned. To display the list of additional items, hover over the item in the column. Using the column chooser, you are able to display two columns that don't show up on the Device page:
Both fields are available as filters on device widgets, and for the date field, the usual date grouping options are available. For a list of events that count as Last Activity on a device, refer to On a device. |
||||||
|
Click the refresh icon |
NOTE Context menu options are determined by your security level and which table you are viewing.
Hover over the context menu icon ![]() to access the following options:
to access the following options:
| Menu Option | Description |
|---|---|
|
Organization Actions |
|
| View Organization | Opens the Organization page. Refer to The Organization page. |
| Edit Organization | Opens the Edit Organization page where you can edit all organization fields. Refer to Editing an organization. |
|
Disassociate Sub-organization |
Removes the sub-organization status of the selected organization. The former sub-organization is now an unrelated organization in your Autotask instance, divorced from its former parent organization. IMPORTANT Parent organization billing contracts on sub-organization tickets and projects will be removed without warning! Also, parent organization contacts will be removed from sub-organization change advisory boards. |
| Close Opportunity Wizard | Refer to Closing opportunities you have won. |
| Lost Opportunity Wizard | Refer to Setting an opportunity as lost. |
| Reassign Lead Wizard | Refer to Reassigning opportunities . |
| Convert Organization to Location | Refer to Converting a sub-organization to an organization location. |
| Cancel Organization | Refer to Canceling an organization. |
| Delete Organization | Refer to Deleting an organization. |
|
Add |
|
| New Note | Opens the New Organization Note page. Refer to Adding or editing CRM (organization, contact, or opportunity) notes. |
| New Ticket | Refer to Adding, copying, and editing tickets. |
|
New Contact |
Refer to Adding and editing contacts |
|
Copy to Clipboard |
|
|
Organization ID & Name Organization ID Organization URL |
Copy the selected organization fields to the clipboard. Note that the Organization URL refers to the link to the organization record in Autotask, not the organization's website. |
|
RMM |
|
| Open Datto RMM Site | This option is only available if the administrator has enabled permissions to view links to Datto RMM on the Datto RMM Integration page. Refer to Resource permissions for the Datto RMM Integration. If the organization is mapped to a Datto RMM site, you can open the site the organization is mapped to. If the organization is mapped to multiple sites, the site to open must be selected from a list. Refer to Navigating from the Autotask organization to the RMM site. |
|
LiveLinks |
|
| LiveLinks | Refer to LiveLinks for more information on LiveLinks. |
PERMISSIONS Requires CRM security level permission for Organizations to delete Mine or All
If you have sub-organizations (child/parent relationships) that function more like organization locations than sub-organizations, you can use the Convert Organization to Location tool to convert them to locations. If you're not sure whether you want a sub-organization or a location, refer to Organization locations and parent/sub-organization relationships.
NOTE The tool does not perform bulk conversions.
- Locate the sub-organization to convert and access the Convert Organization to Location tool in one of these locations:
Sub-Organization page > Tools menu
Parent Organization page > accessory tabs > Sub-Organizations > context menu
Organization Search > results table > context menu
Dashboard > Organization widget > Organization Drill-In table > context menu
- Click Convert Organization to Location and review the message.
- Click Yes to continue.
- Read the message that opens and, to continue the conversion, click Yes.
IMPORTANT Once you click Yes, you cannot cancel or undo these actions.
When you click Yes, the conversion tool does the following:
- Creates a new location for the parent organization that has the same name as the sub-organization. If the parent organization already has a location of that name, (#) is appended to the new location's name, where # tracks the number of locations created with the same name.
- Uses the sub-organization's Address 1, Address 2, City, State, Zip Code, Country, Additional Address Information, Phone, Alternate Phone 1, Alternate Phone 2, Fax, Round-Trip Distance, Tax Exempt and Tax Region settings to populate the new location's corresponding fields.
- Merges the sub-organization into the parent organization, moving all the sub-organization's associated entities, for example, tickets, contacts, etc. to the parent organization. On the merged entities that have a Location field (Contacts, Tickets, Devices, Service Calls, Billing Items), the field is set to the newly created location.
NOTE Datto RMM sites mapped to the sub-organization will need to be re-mapped in Datto RMM to a new Autotask organization for the sync to continue to work.
- Deletes the sub-organization. Deletion cannot be undone!
If Convert Organization to Location is not available, the selected organization cannot be converted for one of the following reasons:
- It is not a sub-organization (does not have a parent account)
- It has one or more contracts or multiple locations (more than just the primary location)
- It has one or more posted billing items where the parent organization is your own local organization
- It has Taskfire enabled, but its parent organization does not have Taskfire enabled
- It is an outsource partner
- The sum of its locations and the parent organization's locations is greater than 1000
TIP Hover over the gray Convert to Organization Location to see which reason applies.
If a sub-organization was sold to a different organization that will become the new parent, do the following:
- Put the sub-organization into Edit mode.
- In the Parent Organization field, delete the current parent and use the organization selector to assign the sub-organization to the new parent.
There is no easy way to transfer parent organization status from the old parent organization to one of its sub-organizations. You must do the following:
- Disassociate all sub-organizations from the parent organization. This is necessary because an organization can either be parent or sub-organization, but not both.
- Open the Organization page of the sub-organization that will become the new parent.
- Click the Sub-Organizations accessory tab.
- Click the Associate Existing Organizations button.
- Click the selector icon
 and use the quick search row to locate all organizations you want to make sub-organizations to the new parent. Select the check box to move the organizations to the Selected Items list.
 - Click Save & Close.


