Searching and managing devices
PERMISSIONS Security level with access to CRM and object permissions to add, edit, and delete devices for organizations to which you have access
PERMISSIONS To request an RMA, Can request RMA Contract security settings enabled.
NAVIGATION Left Navigation Menu > CRM > Search > Devices > context menu
NAVIGATION Left Navigation Menu > CRM > Search > Organizations > Organization page > Devices accessory tab > context menu
NAVIGATION Left Navigation Menu > Contracts > Search > Contracts > context menu (![]() ) > View Contract > Devices > right-click menu
) > View Contract > Devices > right-click menu
NAVIGATION Dashboard > Device drill-in tables and widgets
- To display a list of all records of a given entity in your Autotask instance, click Search without applying any filters.
Search results containing more than 25, 50, or 100 records (depending on your Records per page setting) are paginated. Use page navigation to view additional results. At most, 5,000 data record will be retrieved at any one time.
- To search for specific records, apply one or more search filters. Refer to Applying a search filter.
The Active filter defaults to Active on the Organization Search, Contact Search, My Organizations, and My Contacts pages, as well as on the global Search by Organization, Contact (First Name), Contact (Last Name), and Contact (Email). The counters in the My menu also reflect only active entities.
NOTE There are several options for phone number filters. The Phone filter will look for a contains match that includes any characters (such as - or () ) entered in the filter box. The Organization Search and Contact Search pages have a Phone (numbers only) option that will ignore special characters in the filter and the results. It will do a contains search for just the numbers entered in the filter box. The Contact Search page also allows you to do a Phone (Starts With) search. It will search for phone numbers that start with the value entered in the filter box.
The following tool buttons appear above the results list:
| Tool Button | Description | ||||||
|---|---|---|---|---|---|---|---|
|
|
Many Search pages (but not the widget drill-down tables) allow you to create a new instance of the selected entity. This button is visible before you execute a search:
For help with populating the fields, refer to the context-sensitive Help of the page that opens. |
||||||
|
|
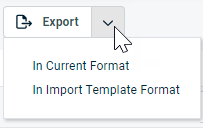
PERMISSIONS By default, Export is available to users with Admin security level, and disabled for all others. It can be enabled for other security levels. Refer to Can export Grid Data. NOTE When exporting to CSV: To ensure consistent date/time formatting in the CSV output, we strongly recommend that the user’s date/time format settings in Autotask be identical to the Windows date/time format settings of the computer performing the export. This will prevent conflicts in how the software that generates the report interprets the date/time format. IMPORTANT Fields related to billing products for devices and contacts will not be exported.
NOTE Only the first 5,000 records will be exported. |
||||||
|
|
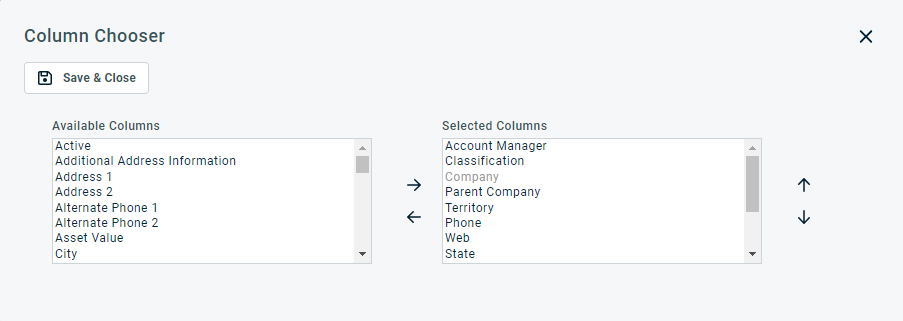
The Column Chooser allows you to customize search results tables throughout Autotask. It determines the following:
NOTE Column Chooser settings on search results tables and some standard reports are part of the user settings stored on the Autotask server. You can log in from any computer and have your column chooser settings applied to your Autotask session. To clear the data stored in your Autotask instance and reset the column chooser settings to the Autotask default settings, click Reset Settings in My > Miscellaneous > Settings. To customize the table, do the following:
Columns appear either in the Available Columns or the Selected Columns panel.
NOTE Top-to-bottom order in the Selected Columns list becomes left-to-right order on the Search Results list.
TIP If the characters + # appear after the column name, then that column may have multiple items returned for some rows. If that occurs, the first item will appear in the row followed by + and the number of additional items returned. To display the list of additional items, hover over the item in the column. Using the column chooser, you are able to display two columns that don't show up on the Device page:
Both fields are available as filters on device widgets, and for the date field, the usual date grouping options are available. For a list of events that count as Last Activity on a device, refer to On a device. |
||||||
|
|
Click the refresh icon |
NOTE Which context menu options are available to you is determined by your security level.
Hover over the context menu icon ![]() to access the following options:
to access the following options:
| Context Menu Option | Also available in Bulk Menu | Description |
|---|---|---|
|
General |
||
| View Device | Click to open the Device page where you can view all information for the item, including insights from other areas of Autotask. Refer to The Device page. | |
| Edit Device | Click to open the Edit Device page where you can edit all device fields. Refer to Adding and editing devices for more information. | |
|
Remove Related Item, Disassociate Child, Disassociate Parent |
|
These options are only available on the Related Items table of devices. Depending on the relationship status, selecting one of these options will disassociate the related item without additional warning. Refer to Managing relationships between devices (The Related Items tab). |
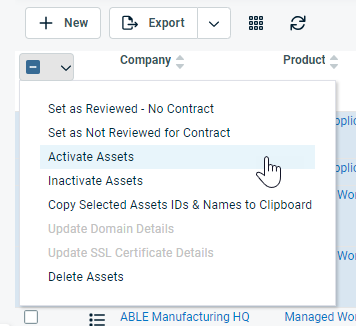
| Set as Reviewed - No Contract | Allows you to manage the assignment of a billing contract. Refer to Contract review for devices. | |
| Set as Not Reviewed for Contract | Allows you to manage the assignment of a billing contract. Refer to Contract review for devices. | |
| Activate / Inactivate Device(s) |
Active devices are available in the Devices data selector page and can be referenced on a new ticket. However, from the context menu on a device table, you are able to create a ticket for an inactive device. |
|
| Delete Device(s) | Object permissions are required to add, edit, and delete devices. Deletion cannot be undone. NOTE You cannot delete a device that is associated with a ticket, has associated subscriptions with posted billing periods, or is associated with the VSA 10 or the Datto Network Manager integration. |
|
|
Other |
||
| Copy Device |
Click to create a copy of the selected item. You can copy the item to the same or to another organization. The Copy Device page opens with multiple fields pre-populated. Refer to Copying a device. NOTE This menu item will not appear for devices associated with VSA 10. |
|
| Merge Into Another Device |
Click to launch the Merge dialog box. The selected device will be inactivated. Any fields that have a value for this device, but not for the selected device, will be copied over to the selected device. Attachments will be moved from this device to the selected device, but tickets and subscriptions will not be moved. Refer to Merging entities. NOTE This menu item will not appear for devices associated with VSA 10. |
|
| Swap Device | Replace this device with another. This option appears only when the Inventory module is enabled. For additional information on the Swap Device Wizard, refer to Swapping a device. |
|
| Move Device |
Select to move a device from one organization to another. This option creates a copy of the device for another organization, inactivates the original item for the source organization, and creates a link from the new item back to the original. Refer to Moving a device. NOTE This menu item will not appear for devices associated with VSA 10. |
|
| Update Domain Details (if Category = Domain only) |
Triggers a check of the domain details and updates them accordingly. This is useful if you have made changes to the domain (like TXT or MX Records) and want to confirm the changes have been picked up. This will update the date, time, and resource values in the Last Updated field. This option is hidden if Domain & SSL Certificate Tracking is not enabled. |
|
|
Update SSL Certificate Details (if Category = SSL Certificate only) |
Forces a check of the SSL certificate details and updates them accordingly. This is useful if you have made changes to the SSL certificate (like TXT or MX Records) and want to confirm the changes have been picked up. This will update the date, time and resource values in the Last Updated field. This option is hidden if Domain & SSL Certificate Tracking is not enabled. |
|
| New Ticket | Select to create a new ticket for this device. The device will automatically be selected in the new ticket. Refer to Adding, copying, and editing tickets. | |
|
Request RMA |
|
This option is only available for products that have been marked eligible for RMA. Select to request a Return Merchandise Authorization (RMA) when a device needs to be returned and a refund issued to the partner. Refer to Requesting an RMA for a device. |
|
Copy to Clipboard |
||
|
Device ID & Name |
Copy the device ID and name to the clipboard. |
|
|
Device ID |
|
Copy the device ID to the clipboard. |
|
Device URL |
|
Copy the device URL (link) to the clipboard. |
|
Device Serial Number |
|
Copy the device serial number to the clipboard. |
|
Device Reference Number |
|
Copy the device reference number to the clipboard. |
|
Device Reference Name |
|
Copy the device reference name to the clipboard. |
|
Datto RMM |
||
| Datto RMM | You will see this sub-menu only if the Datto RMM Integration is enabled for you. It allows access to Datto RMM tools for tickets and devices that have a Datto RMM Alert ID. Refer to The Advanced Datto RMM Integration. It will be disabled if the device does not have a Datto RMM device mapped to it. |
|
|
Datto |
||
| Datto | You will see this sub-menu only if the Advanced Datto Integration is enabled for you. It allows access to Datto links for tickets and devices that have a Datto Alert ID. Refer to Using Datto RMM and BCDR tools from Autotask. It will be disabled if the device does not have a Datto device mapped to it. |
|
|
LiveLinks |
||
| LiveLinks | This menu allows you to access any LiveLinks that have been added to the device. A LiveLink is a link to an external web site or another page within Autotask. To add a LiveLink to a device, use the Installed Product entity type when creating the LiveLink. Refer to LiveLinks for more information on this topic. | |


